What Is Sound Check in Apple Music and How to Use It

Grace's user avatar
Grace
February 28, 2025

When listening to music, you’ve likely experienced sudden volume changes between songs. One track might be so quiet that you can barely hear it during a noisy train commute, while others may blast at full volume, distracting you from studying or working with your favorite playlist in the background. Fortunately, Apple Music’s Sound Check feature can solve this problem. By automatically adjusting the volume of all your songs to a consistent level, it delivers a smooth listening experience without straining your ears or struggling to hear. Check out this guide to learn what Sound Check is on Apple Music and how you can make the most of it.

What Is Sound Check on Apple Music

Apple Music’s Sound Check is a feature designed to normalize the volume levels of songs, ensuring that all tracks play at a consistent loudness. This way, you don’t need to constantly adjust the volume while listening.

Once enabled, Sound Check works automatically in the background. This is particularly useful when listening to playlists with songs from various artists and albums, which often vary significantly in loudness. Sound Check analyzes the loudness of each track and adjusts the playback volume to deliver a more balanced sound. Importantly, Sound Check only alters playback volume without changing the actual audio files, leaving your original audio files untouched.

Pros and Cons of Using Sound Check

Apple Music’s Sound Check is a handy feature, but it may not for everyone. Understanding the advantages and disadvantages of Sound Check can help you decide whether it’s the right feature for you.

Pros of Using Sound Check

  • Consistent Volume Levels
    • Enjoy consistent volume levels across all songs, eliminating sudden jumps or drops. Ideal for background music and fluctuating noise environments.
  • Hearing Protection & Reduced Fatigue
    • Prevents excessively loud tracks, protecting your hearing and reducing fatigue from constant volume adjustments.
  • Ease of Use
    • It’s available on various devices. Once enabled, Sound Check works automatically in the background.

Cons of Using Sound Check

  • Reduced Dynamic Range
    • Sound Check can reduce the dynamic range of music (the difference between the quietest and loudest parts of a song), making music sound “flat” to some listeners or potentially alter artistic Intent and emotional impact.
  • Potential Quality Trade-Offs
    • Although it doesn’t modify source files, Sound Check’s processing may lower perceived dynamic range, which can potentially diminish the advantages of Lossless or Hi-Res Lossless audio, especially on high-quality audio equipment.
  • Limited Customization
    • Sound Check is a one-size-fits-all feature, without options for users to adjust its intensity, which may not satisfy those who like to customize their sound.

In summary, if you prioritize consistent volume and a smooth listening experience, Sound Check is a valuable feature. If you are an audiophile who values the original dynamic range of music, you may prefer to disable it. The best way to determine if Sound Check is right for you is to experiment with it on and off.

How to Turn Sound Check On or Off

Apple Music Sound Check works on various devices, including iPhone, iPad, Android, Mac, Windows, Apple TV, etc. Here’s a step-by-step guide on how to turn in on and off:

On iPhone and iPad

  1. Go to Settings on your iPhone or iPad and select Apps.
  2. Scroll down and tap “Music.
  3. Find Sound Check and turn it on or off.
apple music sound check iphone

On Android

  1. Open the Apple Music on your Android.
  2. Tap the three dots at the top right and select Settings.
  3. Enable or disable Sound Check.

On Mac & Windows

  1. Launch the Apple Music app on your Mac or Windows.
    • On Mac: Click Music from the top menu
    • On Windows: Click the three dots at the top of the sidebar
  2. Select Settings.
  3. Select Playback.
  4. Check or uncheck the box next to “Sound Check” and click “OK.”

On Apple TV

  1. Go to Settings on your Apple TV.
  2. Select Apps > Music.
  3. Turn Sound Check on or off.

FAQs About Apple Music Sound Check

Does Sound Check affect audio quality?

Sound Check doesn’t change the original audio file but only adjust the volume during playback. However, while normalizing volume levels, it may compress the dynamic range slightly. Some listeners might perceive this as a change in audio quality, particularly when playing lossless-quality music or using high-end audio equipment.

Can I use Sound Check with downloaded songs?

Yes, you can use Sound Check with downloaded songs on Apple Music. The feature works with both streamed and downloaded tracks.

Extra Tip: How to Download Apple Music Songs to MP3

Apple Music allows users to download music for offline playback. However, the downloaded content is only accessible within the Apple Music app while your subscription is active. If you wish to keep Apple Music songs permanently on your devices, you can use a reliable Apple Music downloader like Pazu Apple Music Converter. This safe and efficient tool enables you to download any Apple Music playlists, albums, or songs to popular formats such as MP3, AAC, and FLAC on Mac or Windows.

Not only does Pazu Apple Music Converter download your favorite playlists and songs, but it also preserves the original audio quality, ID3 tags, and metadata, so you won’t lose any important information. One of its standout features is its incredibly fast download and conversion speed – almost 10 times faster than similar software. Additionally, Pazu Apple Music Converter is integrated with the Apple Music web player, allowing you to batch convert any Apple Music playlist or album to the format you choose without iTunes or the Music app.

Key Features of Pazu Apple Music Converter

  • User-friendly interface
  • 10x Fast Music download speed
  • Advanced DRM removal
  • Lossless audio quality
  • Keep original ID3 tags & metadata
  • Download Apple Music songs, albums, and playlists
  • Unlimited downloads
  • Adjustable output options

The following tutorial will show you how to download Apple Music to MP3 and get Apple Music for free. 

Step 1. Launch Pazu Apple Music Converter

Download, install and run Pazu Apple Music Converter on your Mac or Windows.

Apple Music Converter

Step 2. Choose the Output Format

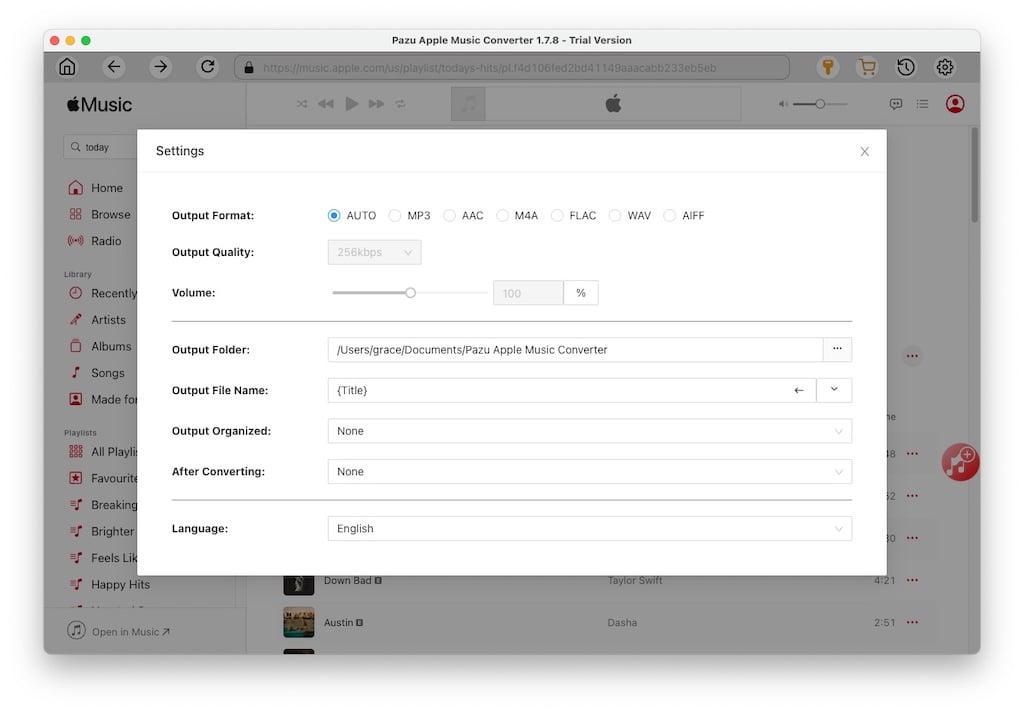
Click the gear icon to customize the output format or output folder. The default format is M4A in 256kbps. Apple Music Converter also supports MP3, AAC, FLAC, WAV, and AIFF.

Apple Music Converter Settings

Step 3. Choose a Playlist, Artist, or Album to Download

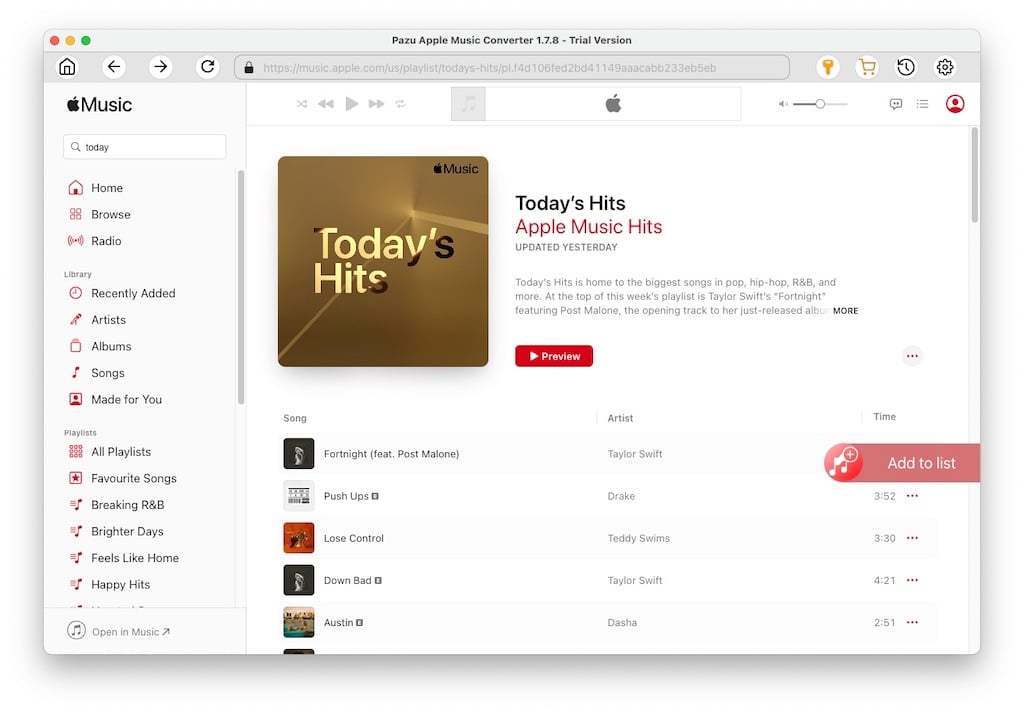
Search for a playlist, artist, or album you want to download. Click the “Add to List” button to load all songs in the album or playlist.

Add to List

Step 4. Download Apple Music Songs

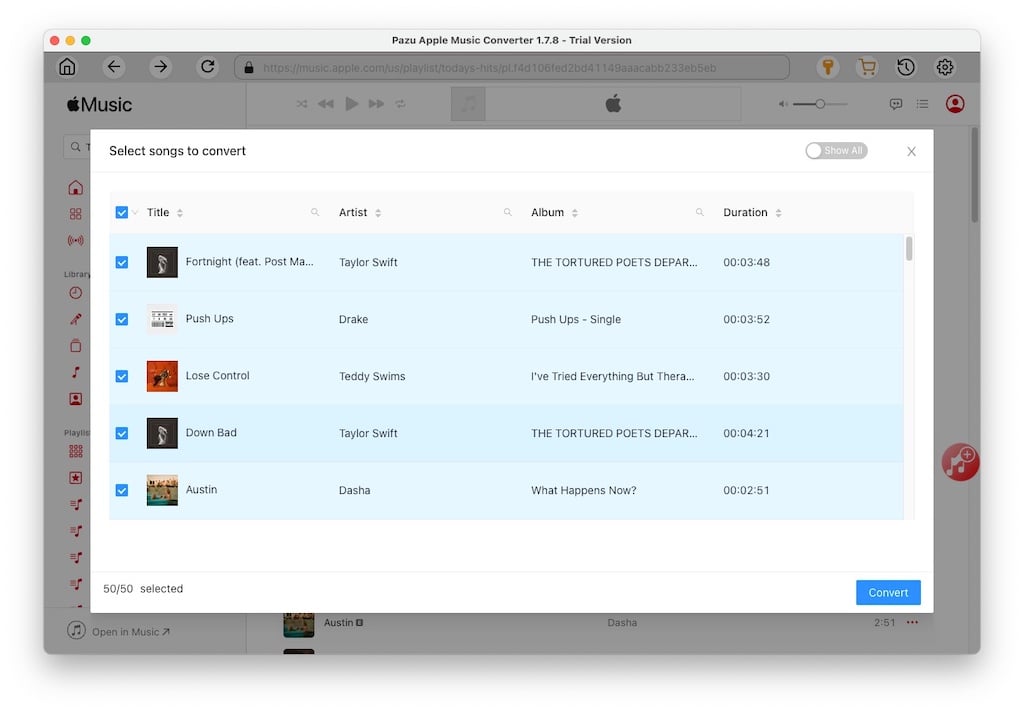
Uncheck the songs you don’t want to download if there are any. Click the “Convert” button to download Apple Music songs, albums, and playlists to MP3.

convert Apple Music

After downloading, click the clock icon in the upper right to view the converted Apple Music songs. You can play them on any supported device, even after your subscription ends.

Apple Music Converter

Apple Music Converter

Download Apple Music to MP3, M4A, etc.