Spotify, as a leading music streaming platform, offers a vast library of songs for both Free and Premium users. While premium subscribers enjoy higher quality audio and the ability to download playlists and albums for offline listening, Spotify doesn’t directly support transferring these downloaded tracks to a USB drive. However, there are alternative methods to accomplish this. If you’d like to copy your Spotify downloads to a USB drive for use on other devices, read on to learn how.
Spotify Free only allows users to download podcasts. Spotify Premium members can download albums, playlists, and podcasts, but not individual songs. You can download as many as 10,000 tracks on each of up to 5 different devices.
To locate Spotify music downloads on your PC or Mac, follow these steps:


Read Also: Where Are Spotify Downloads Stored on Mac/Windows/Android/iOS
Now that you have found your Spotify downloads, you might wonder if you can transfer them to a USB drive for offline playback on other devices. Unfortunately, the answer is no. Unlike common formats such as MP3, M4A, and AAC, Spotify uses encrypted file data to save its downloads. This encryption restricts the downloads to playback only within the Spotify app, preventing you from transferring them to a USB drive for use on other devices.

Luckily, there is an alternative method that allows you to transfer Spotify songs to a USB drive. You can achieve this by downloading Spotify tracks, playlists, and albums as MP3 files on your Mac or Windows computer using a handy tool like Pazu Spotify Converter. Once you’ve converted the Spotify music to MP3, you can easily copy them to your USB flash drive.
Pazu Spotify Converter is specifically designed for both Spotify Free and Premium users. It enables you to download all kinds of Spotify songs, playlists, and albums for offline listening. This converter can extract Spotify music and convert it to various formats, including MP3, M4A, AIFF, WAV, FLAC, and AAC. With Pazu Spotify Music Converter, you can effortlessly download and transfer your favorite Spotify songs to a USB drive, regardless of whether you have a free or premium Spotify account.
Key features of Pazu Spotify Converter:
Now, let’s learn how to use Pazu Spotify Music Converter to download and convert Spotify songs with a free subscription from the following tutorial.
Download, install, and run Pazu Spotify Converter on your Mac or Windows. Log in to your Spotify account with the built-in web player.

Click the gear icon on the top right corner. Here you can select the output format (AUTO(M4A)/MP3/AAC/FLAC/WAV/AIFF), choose output audio quality, customize the output path, organize the output files in various ways, rename output files, and more.

Use the integrated Spotify web player to search the songs, albums, playlists,s or podcasts you want to download. Click the Add to List button to load all songs in the album or playlist, and uncheck the songs you don’t want to download if there are any.

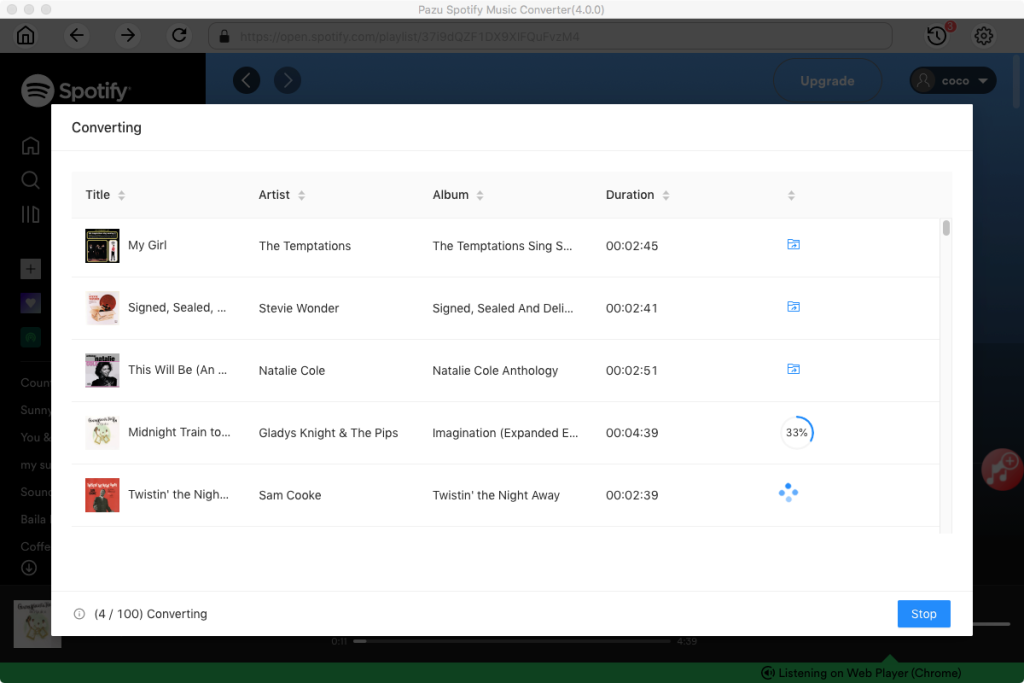
Click the Convert button to start downloading the Spotify songs to your local computer.
Note: The free trial version of Pazu Spotify Converter enables you to convert the first three minutes of each song. You can remove the trial limitation by purchasing the full version.
Once the conversion is done, you can find your Spotify songs downloaded as local files by clicking the Folder button or directly going to the output folder you customized in the previous step. From there, you can copy the downloaded music to your USB drive without any hassle.


Download and convert any Spotify songs, albums, playlists to MP3/M4A etc.