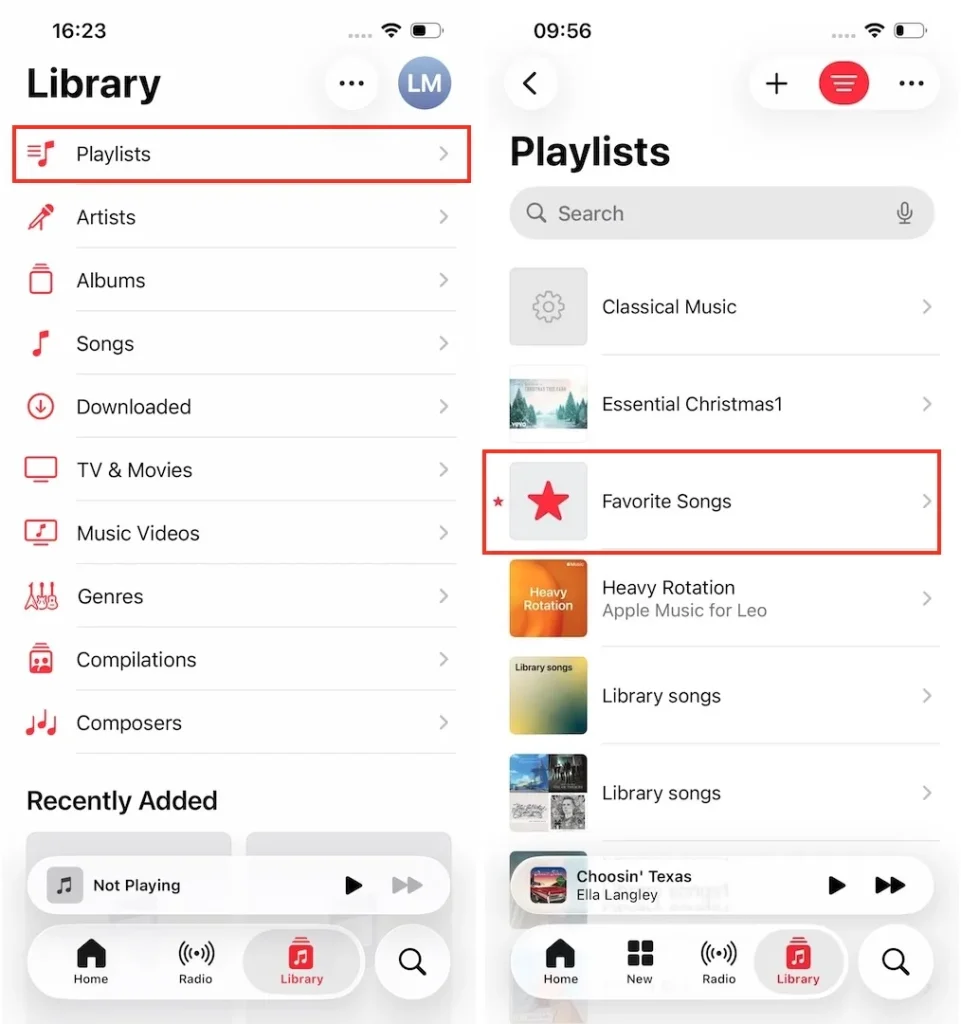
If you’re looking for your loved songs on Apple Music but are not sure where they went, it is because Apple replaced the classic “Love” (heart) icon with the new “Favorite” (star) button. With this change, Apple Music now automatically compiles your starred tracks into a dedicated “Favorite Songs” playlist. Beyond this automatic playlist, you can also view starred tracks in your Apple Music library or filter your loved songs with advanced, auto-updating Smart Playlists. Follow this guide to learn how to do these, as well as how to download your favorite songs as MP3s.
Once you start marking tracks as favorites, Apple Music automatically gathers them into the Favorite Songs playlist. Here is how to locate it across your devices:
On iOS and Android
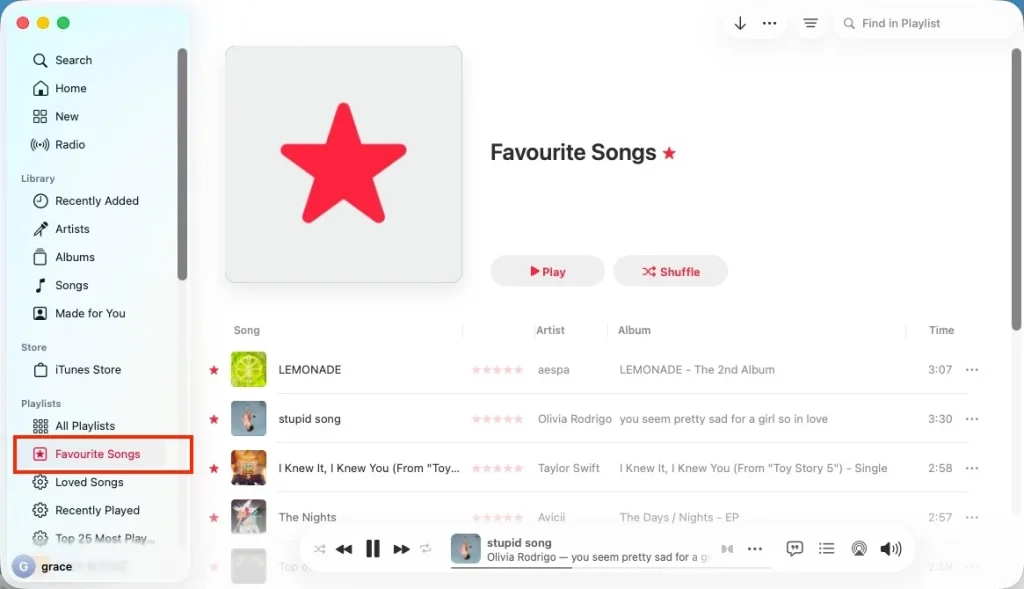
On Mac and PC
Open the Apple Music app. In the left sidebar, look under the Playlists category to find Favorite Songs.
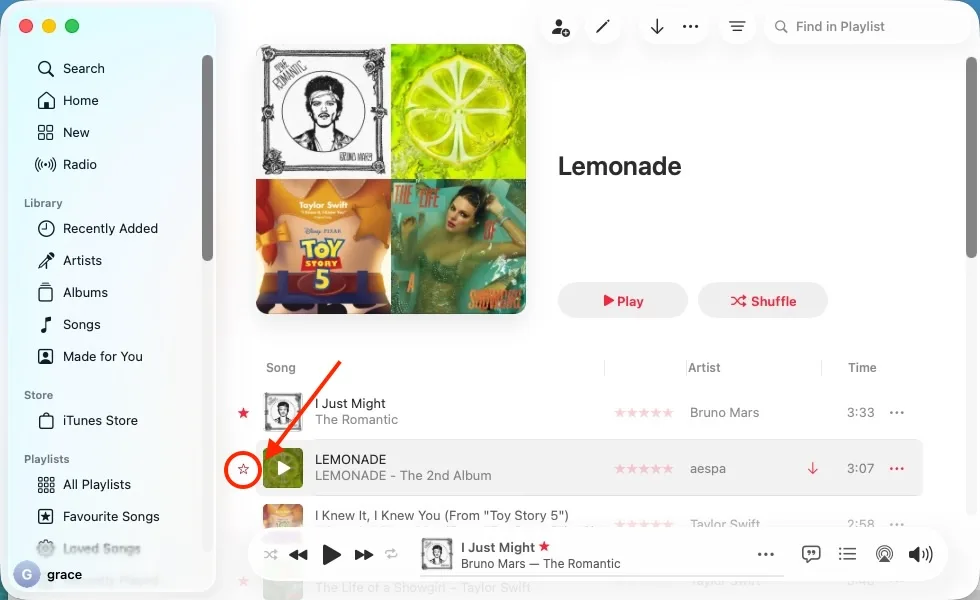
The Favorite Songs playlist remains hidden until you add your very first favorite. Click the hollow star icon before a song on the Apple Music desktop app, or tap the three-dot icon and select “Favorite” (mobile/desktop) to add a track.
If you prefer browsing your main library rather than clicking into a separate playlist, the Apple Music desktop app (Mac or Windows) lets you view and sort your music by columns.
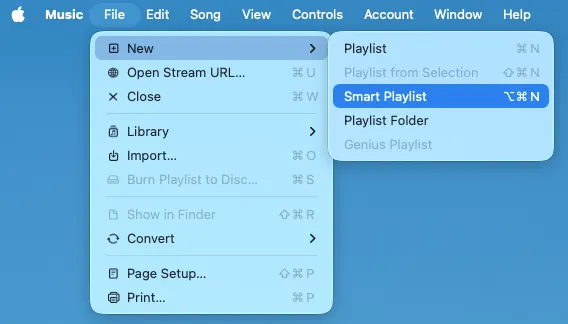
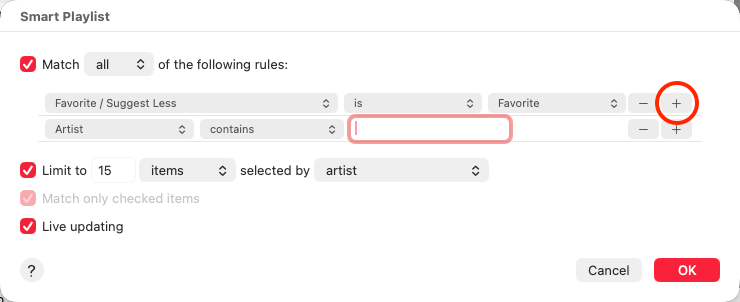
The default “Favorite Songs” playlist can quickly become chaotic if you have hundreds of starred tracks. Fortunately, you can use Smart Playlists on your Mac or PC to slice your favorites into hyper-focused, auto-updating sub-playlists (like “Favorite Rock Songs” or “Favorites by [Artist Name]”).
Here is how to configure a multi-rule Smart Playlist:
Open Apple Music on your Mac or Windows PC. Go to the top menu and choose File > New > Smart Playlist.
Now set the rules for the Apple Music Smart Playlists to filter your favorite songs:
It’s easy to download favorite/loved songs on Mac, PC, Android, or iPhone. However, if the song is added to your library from Apple Music catalog, the downloaded songs can only be played within Apple Music app.
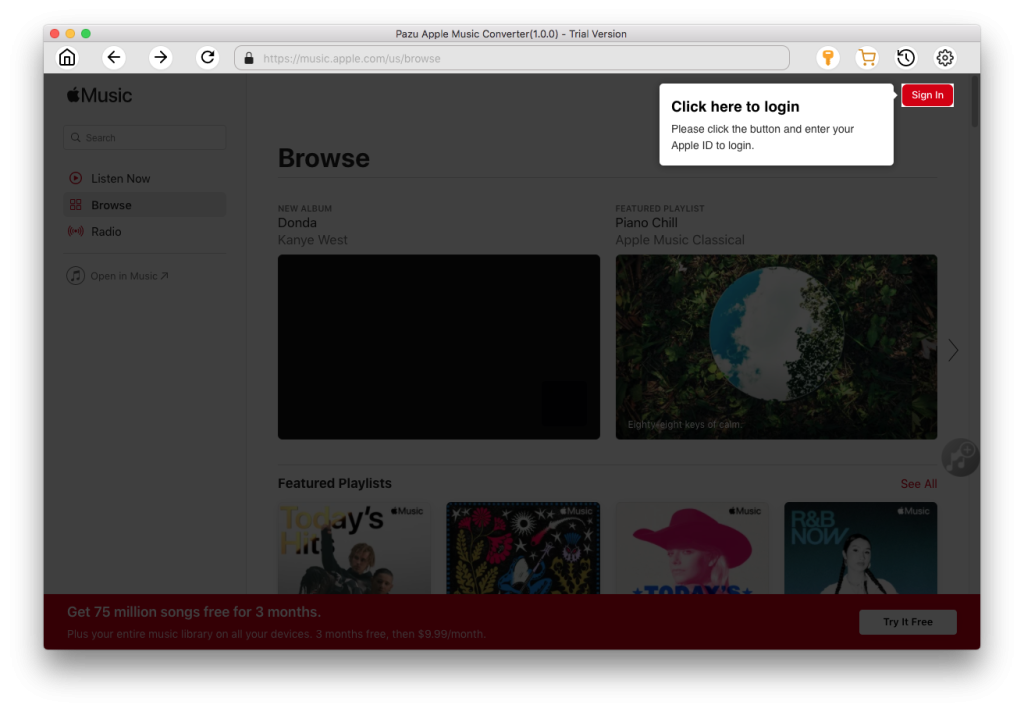
Pazu Apple Music Converter lets you convert Apple Music and iTunes songs you have in your library to MP3, AAC, WAV, FLAC, M4A, and AIFF without any loss in quality. One of the distinguishing features of Pazu Apple Music Converter is that it can download and convert Apple Music at a very fast speed—almost 10 times faster than other similar software. It is integrated with the Apple Music web player, so you can batch convert any Apple Music playlist or album to the format you choose without the Apple Music or iTunes app.
In addition, Pazu Apple Music Converter can recognize and identify tracks as it downloads, and automatically tag the files with the relevant artist name, track title, and album tags as it goes. The downloaded songs are fully searchable by artist, title or album, creating your entire music library simply and quickly.
The following tutorial will show you how to download Apple Music to MP3 and play on any supported devices.
Download, install and run Pazu Apple Music Converter on your Mac or Windows.
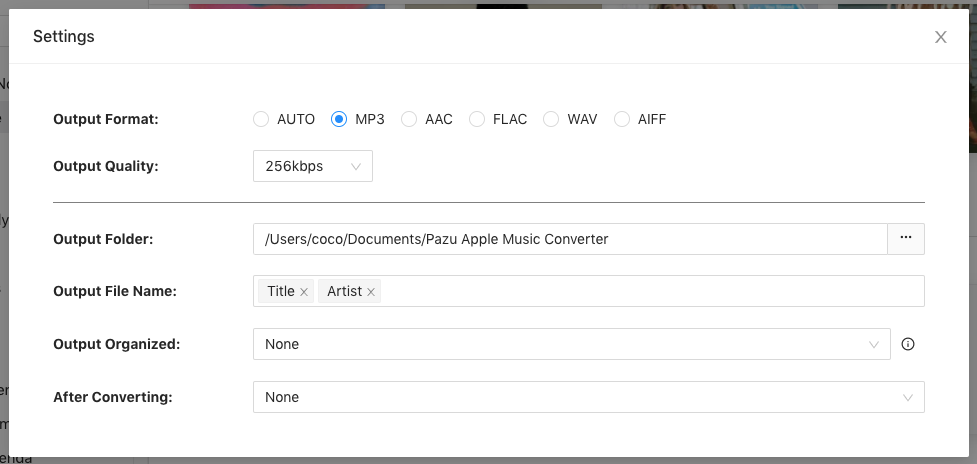
The default format is M4A. Apple Music Converter also supports MP3, AAC, FLAC, WAV and AIFF. Click the gear icon to change the output format or folder.
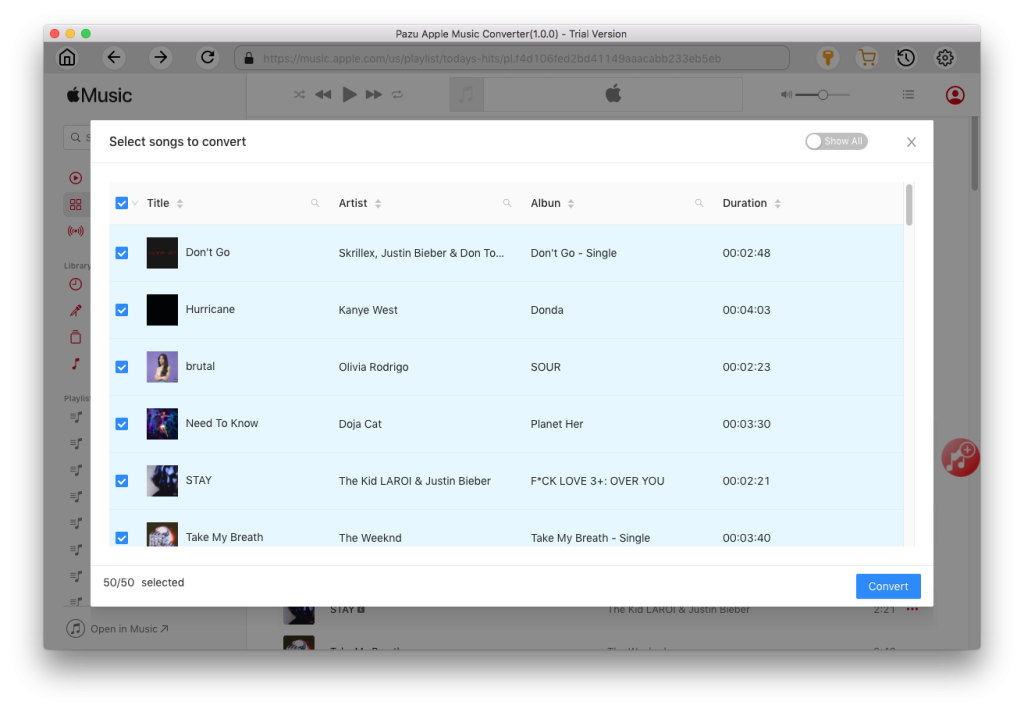
Follow the on-screen instructions to choose a playlist, artist, or album that you want to download.
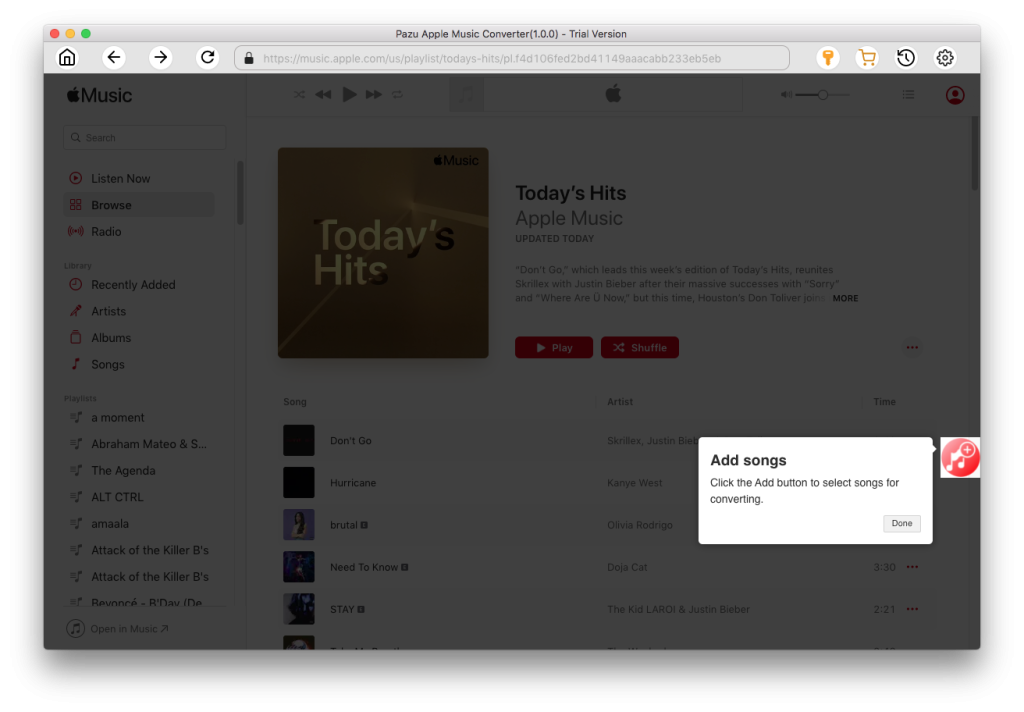
Click the “Convert” button to start downloading Apple Music songs, albums, and playlists to mp3, so you can play them anywhere you want, even after canceling your Apple Music subscription.

Download Apple Music to MP3, M4A, etc.