

Sync Library (formerly known as iCloud Music Library) is Apple’s music storage service. When logged into the same iCloud account on all your devices, the feature will sync all your songs, albums, and playlists, and even restore purchased songs, whether you bought them on your iPhone, iPad, or Mac.
If you subscribe to Apple Music, you’ll get Sync Library included as part of your subscription; otherwise, you can subscribe to Apple’s iTunes Match service and pay $24.99 a year to store your library (up to 100,000 songs) in iCloud.
If you have a large music library, syncing it across devices can consume significant time and bandwidth. Some users also find that Sync Library sometimes mismatches track metadata or album artwork. Fortunately, you can disable Sync Library. It’s easy and should take only a few seconds. Here is how to disable it across iPhone, iPad, Mac, and Windows.
When you subscribe to Apple Music or the standalone iTunes Match service, Apple scans your iTunes music library to check and see which tracks you own are also listed in the iTunes Store.
To save space and upload time, any tracks in your library that are also in the iTunes Music Store catalog are “matched” to the catalog version; this means that when you play the track on your iPhone or another Mac, you get the iTunes Music Store version (a DRM-free, 256kbps quality AAC file, for those who are wondering to say), not your original file. Apple uses metadata matching and audio fingerprinting to match your song to the iTunes Store version. This isn’t perfect, and you may have problems matching live or rare tracks with the studio version – however, for most users, you should be able to use this service without problems.
Any songs that do not match the iTunes catalog will be uploaded to iCloud in their original form, unless they are too low quality (below 92kbps), too long (over two hours), too large (over 200MB), or tracks that you are not authorized to play (for example, songs from another user’s iTunes account that you do not have a username and password to unlock).
After your songs are uploaded, they are stored or matched to your iCloud Music Library; any device you own (up to 10) can stream or download songs from it.
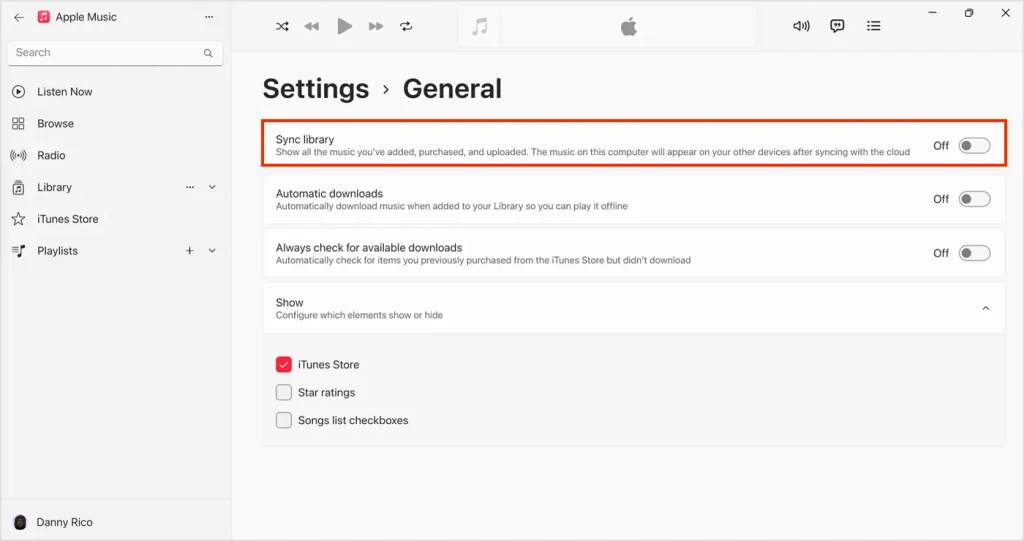
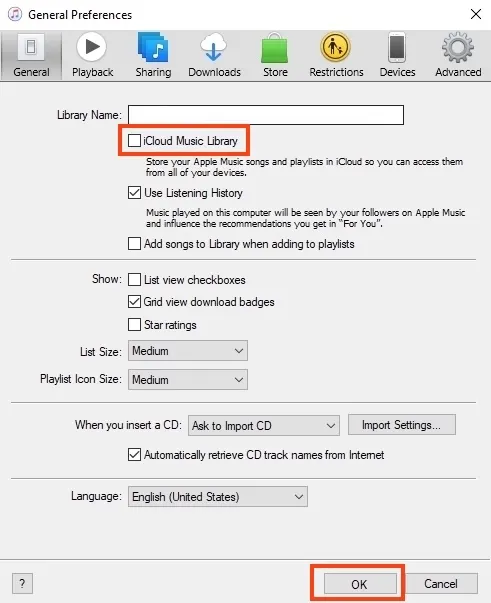
This is what happens to Apple Music and your personal collection when you turn off Sync Library on one of your devices.
If you don’t subscribe to Apple Music or iTunes Match, you won’t see an option to turn off Sync Library or Sync Library.
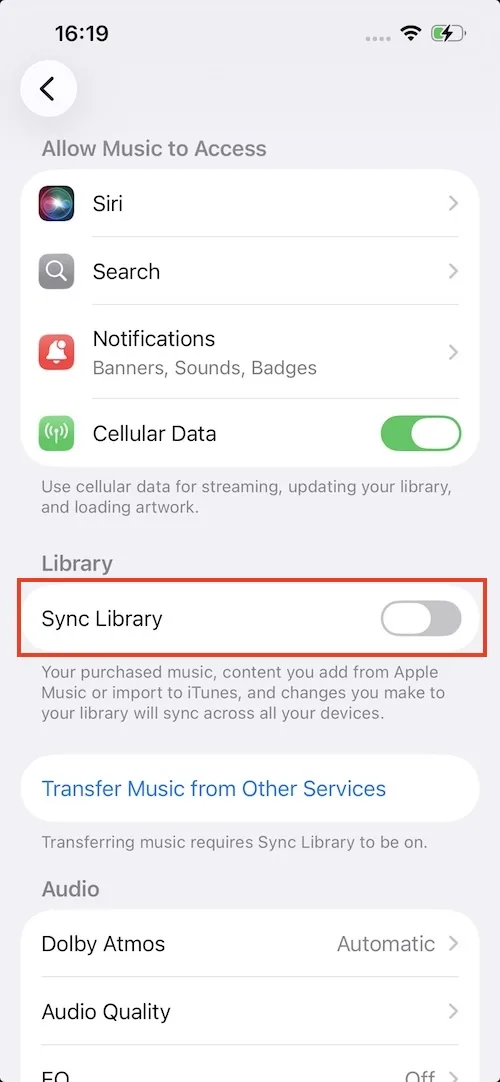
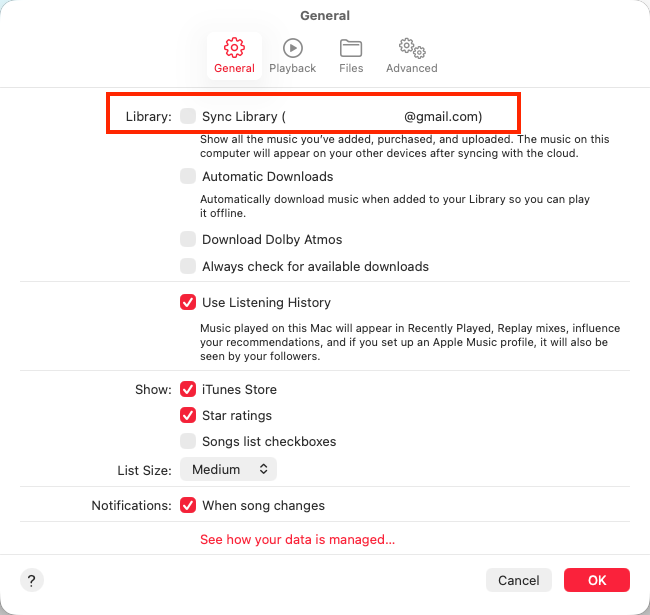
With the Apple Music App
With iTunes
To back up your Apple Music library without iCloud, the best option is to download songs and playlists as MP3s with Pazu Apple Music Converter. Then you can transfer, store, and play downloaded files on any supported device. With Pazu Apple Music Converter, you can download Apple Music playlists, albums, and songs to MP3, AAC, FLAC, and other popular formats on Mac or Windows. It offers remarkably fast download speeds while preserving original music quality.
Follow the tutorial below on how to download Apple Music to MP3 files.
Download, install and run Pazu Apple Music Converter on your Mac or Windows.
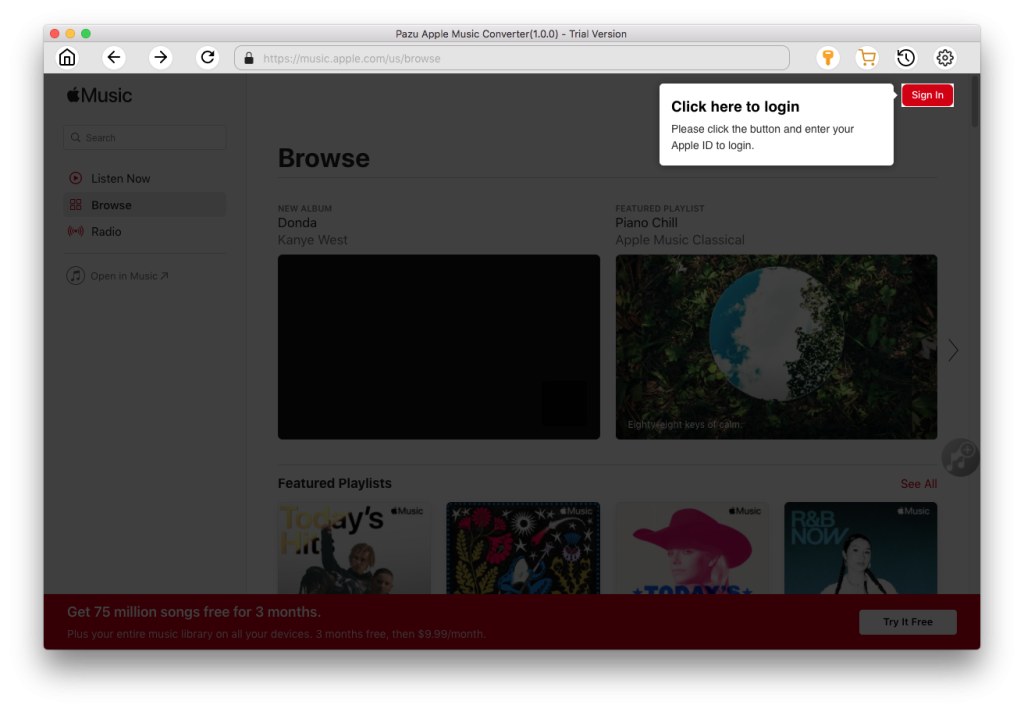
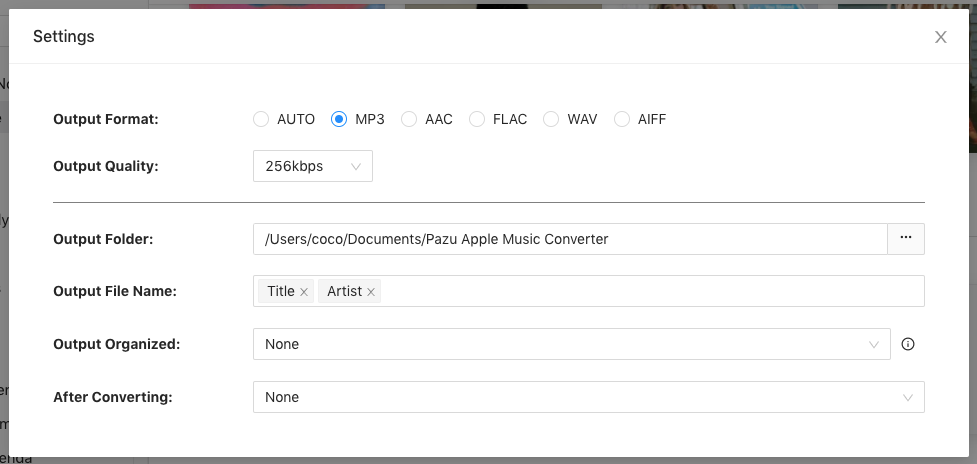
Apple Music Converter supports M4A, MP3, AAC, FLAC, WAV, and AIFF. Click the gear icon if you want to change the output format or output folder.
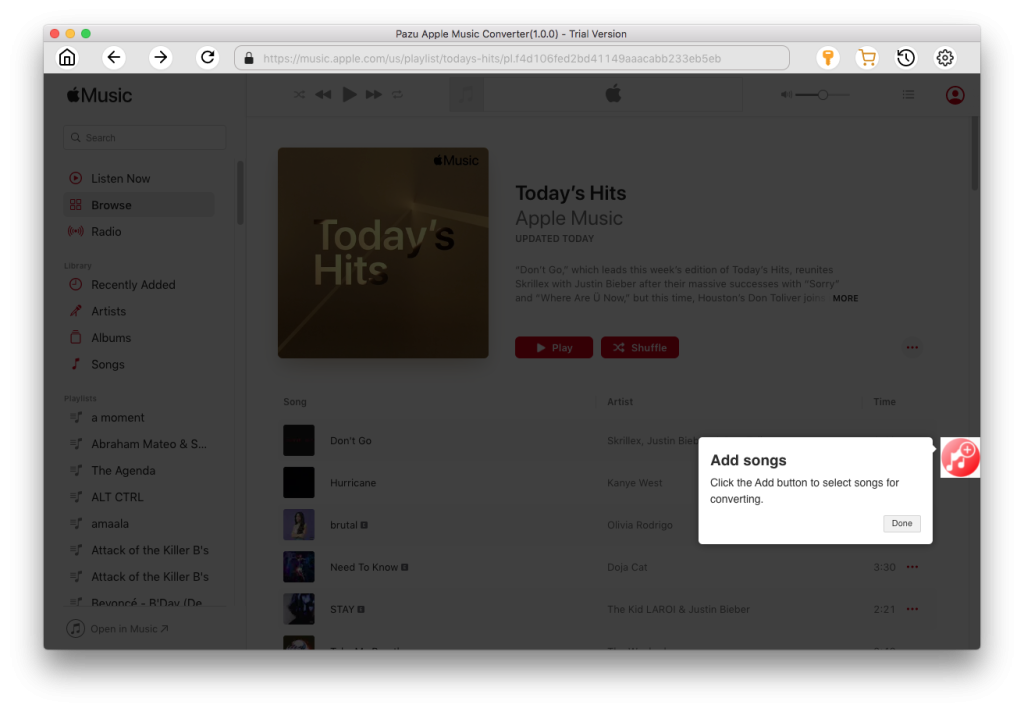
Follow the on-screen instructions to choose a playlist, artist, or album that you want to download. Click the Add Songs button to add them to the download list.
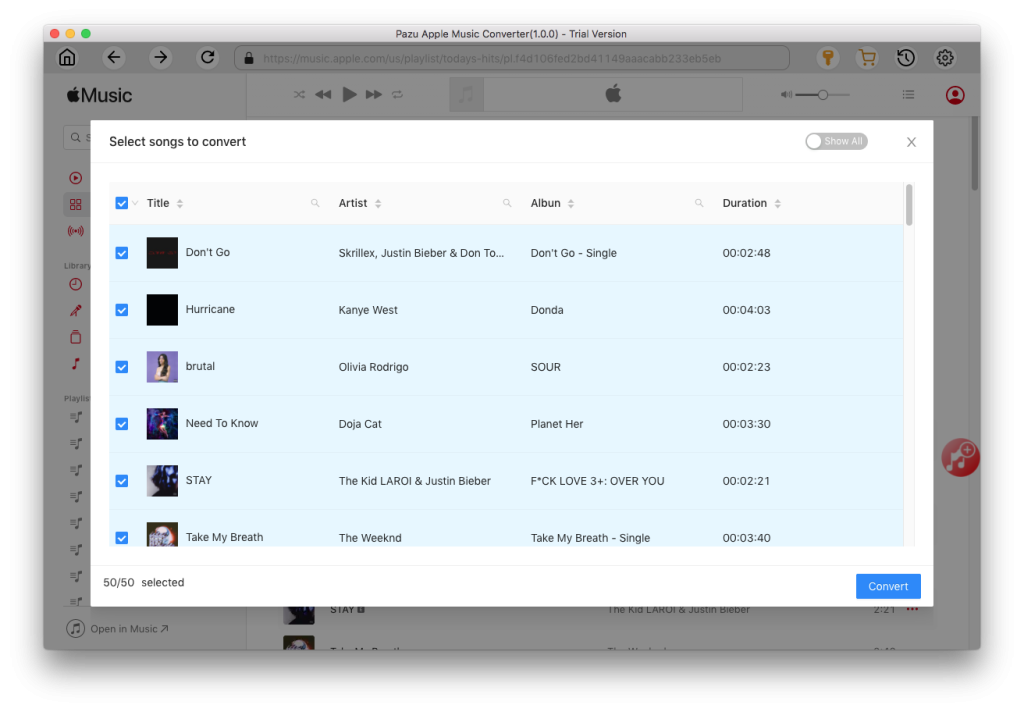
Uncheck the songs you don’t want to download, then click the “Convert” button to download Apple Music songs, albums, and playlists as MP3s so you can play them anywhere, even after canceling your Apple Music subscription.
After the conversion process completes, click the clock icon in the upper-right corner to access the converted Apple Music songs. To locate the converted Apple Music songs:

Now that you’ve successfully converted your Apple Music songs to MP3, you can easily transfer and enjoy them across your devices.

Download Apple Music to MP3, M4A, etc.