With the release of iOS 26 and macOS Tahoe 26, Apple Music introduced AutoMix, an AI-driven crossfade feature to create seamless, DJ-style transitions between songs. While this innovative feature has earned acclaim for creating a more energetic, continuous flow in playlists, it has also faced criticism for skipping song content and for inconsistent performance across different music genres. If you’re ready to try out the cutting-edge AutoMix feature, here is a guide on how to enable it on your devices.
Apple Music AutoMix is an AI-powered feature that creates transitions between songs with techniques such as beat matching and time stretching. AutoMix is exclusive to Apple Music subscribers and is available in the streaming library. This feature doesn’t apply to local music files such as your own MP3 files. This means AutoMix will not be triggered when you transit between local tracks or from a local track to a streaming song, and vice versa.
Apple Music AutoMix is available on iPhone, iPad, Mac with Apple silicon, and Apple Vision Pro with iOS 26, iPadOS 26, macOS Tahoe 26, and visionOS 26.
AutoMix performance varies significantly by genre: it works best with music that has a consistent, defined beat, such as Electronic, Dance, House, and some Hip-Hop, but it often struggles with playlists that feature a varied or eclectic mix of genres. Some users love this feature for its seamless transitions, and some even claimed they would switch from another streaming service to use it. Other users are less satisfied, reporting that it occasionally fails to work or skips song content. Despite its current limitations, AutoMix represents a promising concept and technical execution, and we anticipate that its performance will improve in future updates.
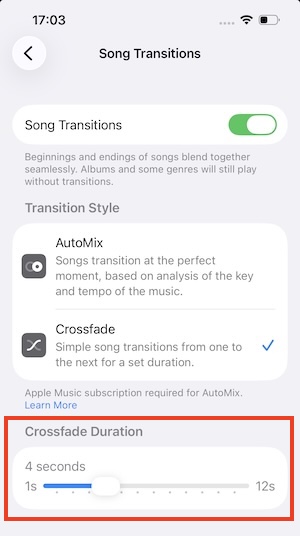
Apple Music’s Crossfade feature allows the next song to fade in (gradually increase its volume) while the current song fades out, making a smooth transition and eliminating silent gaps between songs. It’s typically set to a fixed duration (e.g., 5 seconds), while some Android devices may offer an Automatic option that adjusts the blend time based on playing songs. Crossfade is available to all Apple Music users, even if you don’t have a subscription, meaning you can use it on your local music files as well.
To use AutoMix Apple Music on your iPhone, ensure your device is running iOS 26. If you haven’t updated yet, follow these steps.
Preparation Note: Before beginning any system update, we highly recommend backing up your device using iCloud or your computer. Ensure your iPhone is plugged in and connected to Wi-Fi.
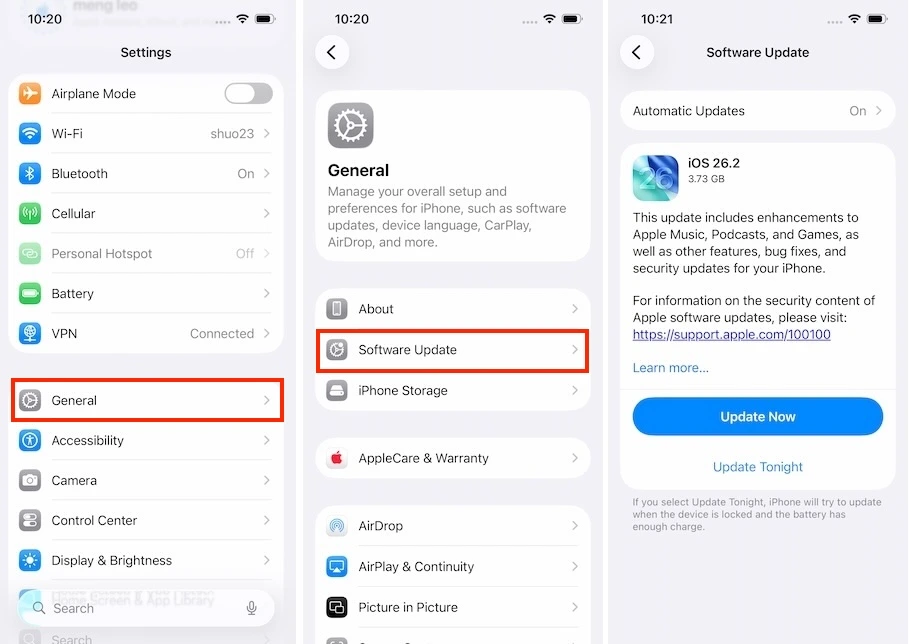
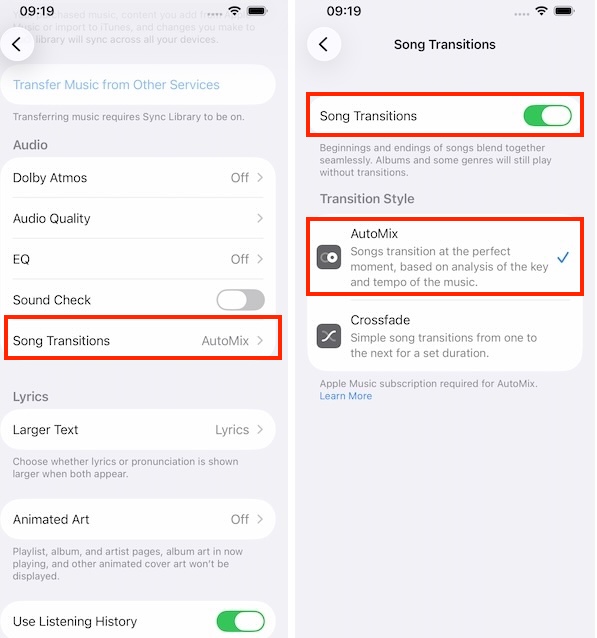
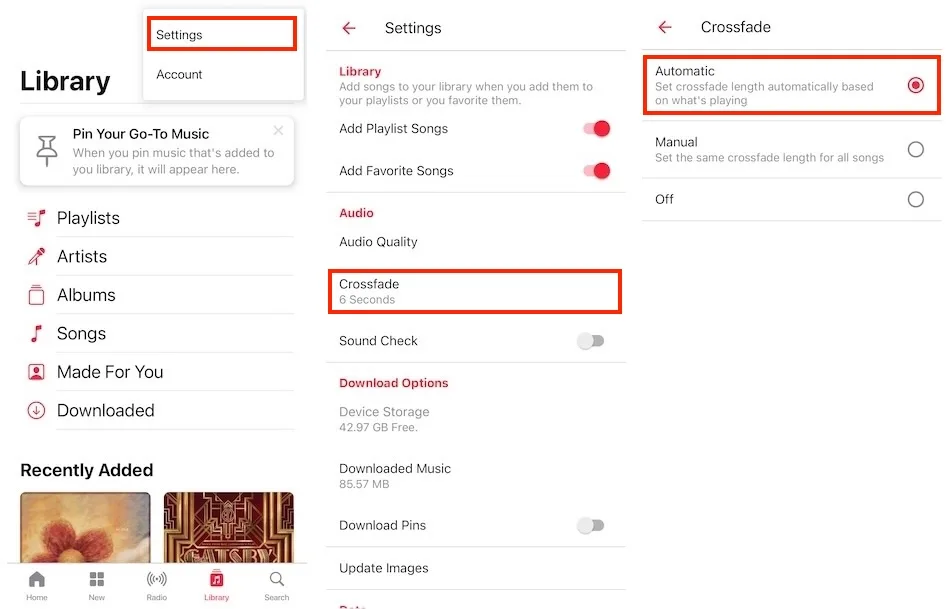
After updating your iPhone, go to Settings to enable AutoMix on Apple Music:
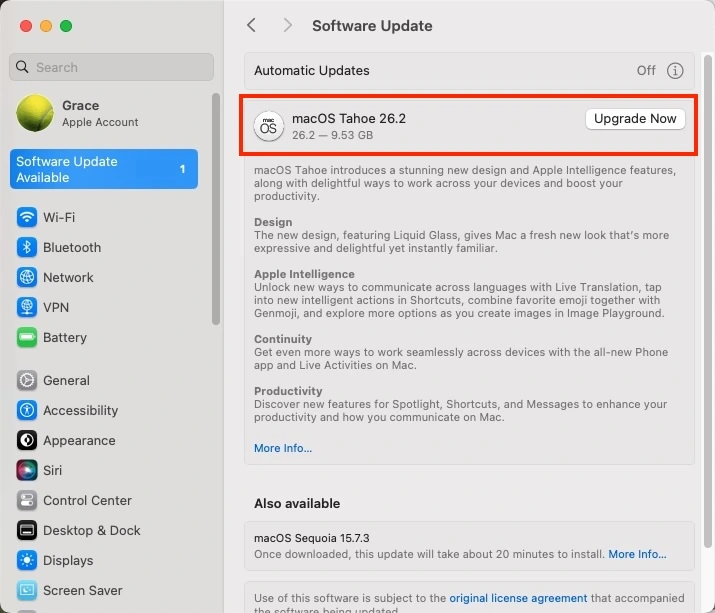
You’ll need to update to macOS Tahoe 26 to use Apple Music AutoMix on Mac. Open “System Settings” and select “Software Update Available” from the sidebar. Then click “Upgrade Now” next to “macOS Tahoe 26.2” to download and install the new software.
Preparation Note: Before beginning any system update, we highly recommend backing up your device.
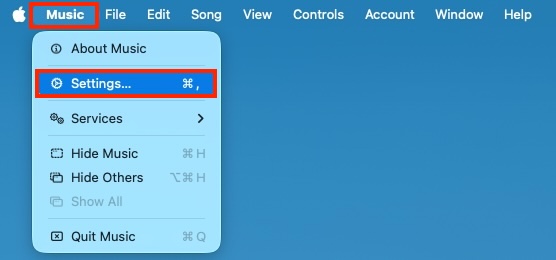
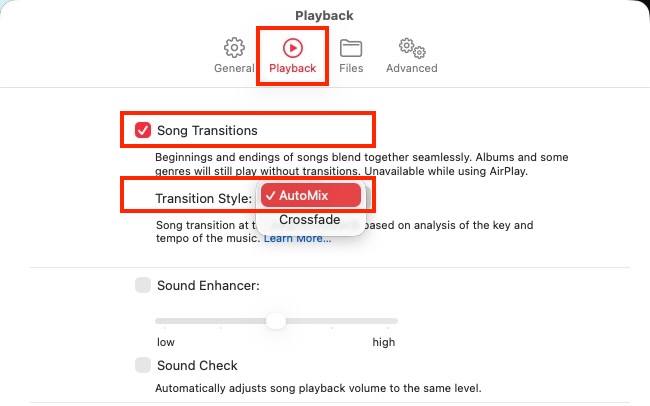
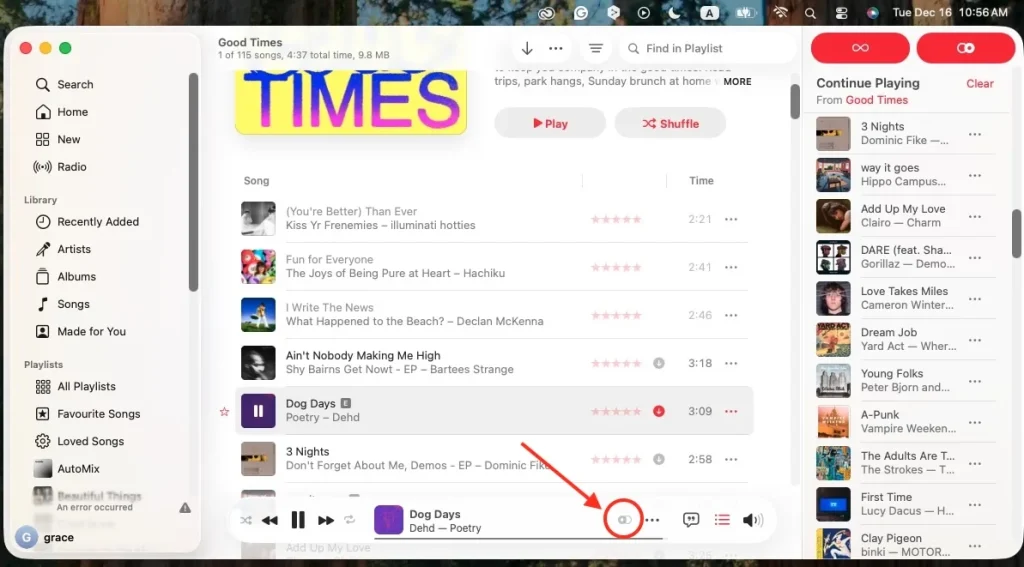
Once your Mac is updated, go to the Music app and enable AutoMix:
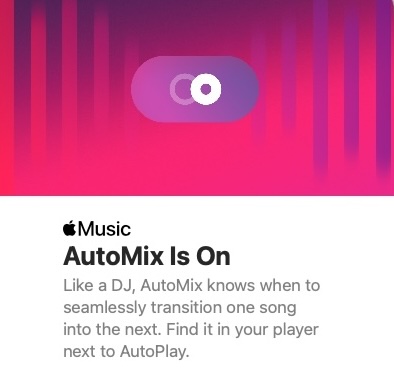
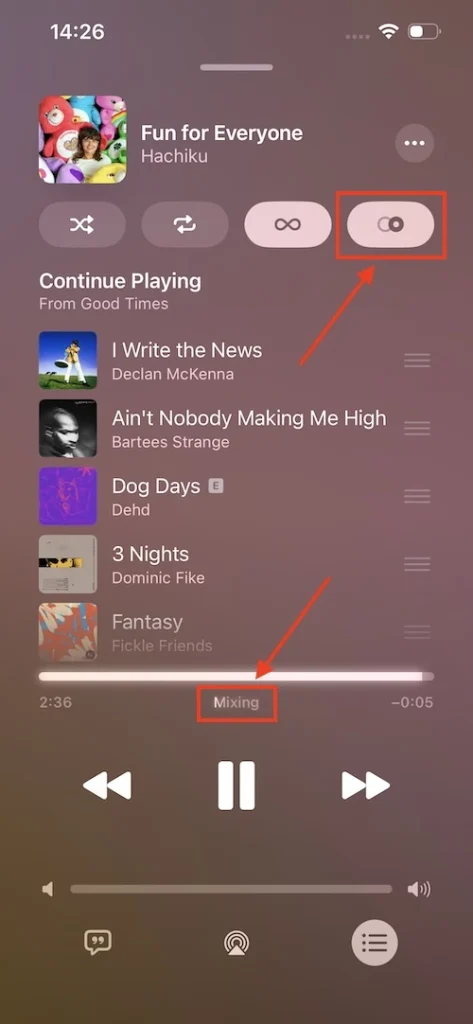
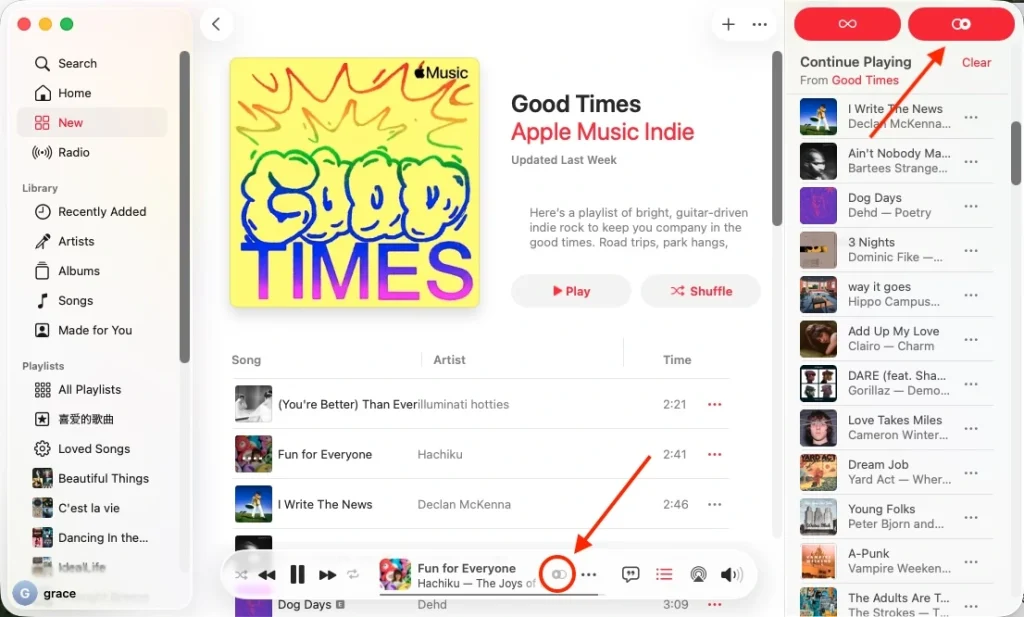
Once Apple Music’s AutoMix is active, you will see two visual indicators:
On iPhone
On Mac
Unfortunately, the AutoMix feature is currently unavailable to Android, Intel-based Mac, Apple TV, Apple Watch, HomePod, or the Apple Music app for Windows.
However, in addition to the standard crossfade (which uses a fixed time), the Apple Music Android app also offers an Automatic Crossfade feature that determines the optimal duration between songs on its own. Many users report that this feature works perfectly on their Android devices running Apple Music.
Here’s how to enable Automatic Crossfade on Apple Music Android:
Yes. If you have an active Apple Music subscription, you can download songs, playlists, and albums for offline listening. You can also use AutoMix with downloaded content when playing without an internet connection. Just enable AutoMix on your device and wait for it to add DJ flair.
As shown in the picture below, the AutoMix symbol appears when transitioning between two downloaded songs while playing Apple Music offline.
However, once your Apple Music subscription ends, you will lose access to the entire library including the downloaded songs, except for your local music files and purchased tracks. To keep your Apple Music downloads after subscription, you can use Pazu Apple Music Converter. This safe and efficient tool helps you save Apple Music playlists, albums, or songs to popular formats such as MP3, AAC, and FLAC on Mac or Windows at fast download speeds – almost 10 times faster than similar software. Downloaded songs preserve the original audio quality, ID3 tags, and metadata. You can transfer them to any supported device and listen to them offline even after your subscription ends.
Key Features of Pazu Apple Music Converter
The following tutorial shows you how to download Apple Music to MP3 with Pazu Apple Music Converter.
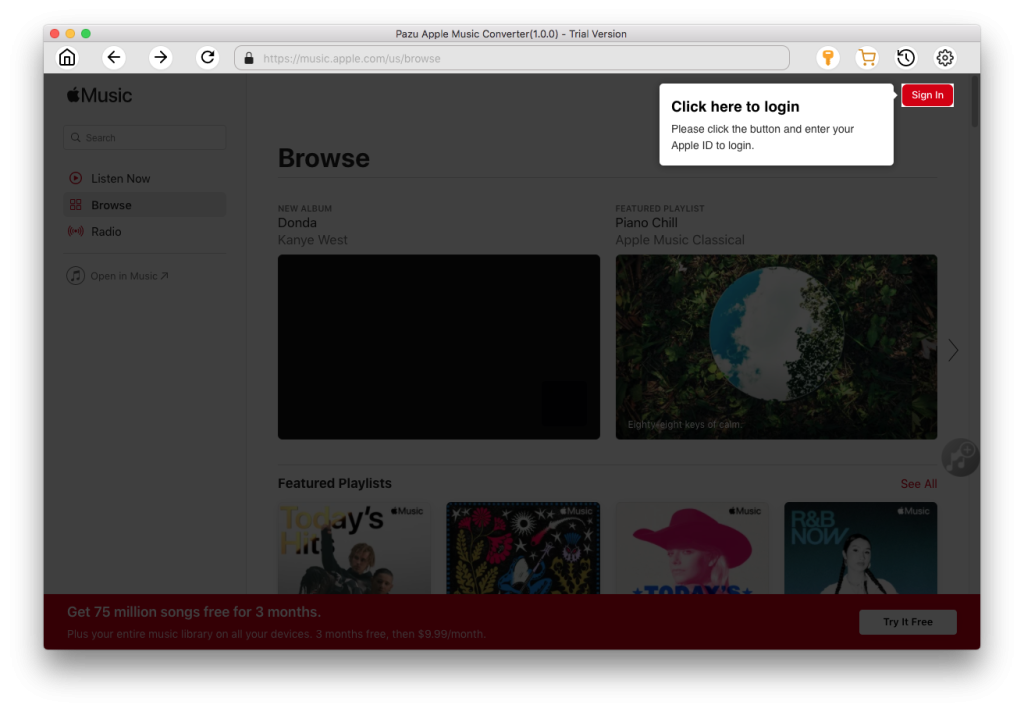
Download, install and run Pazu Apple Music Converter on your Mac or Windows.
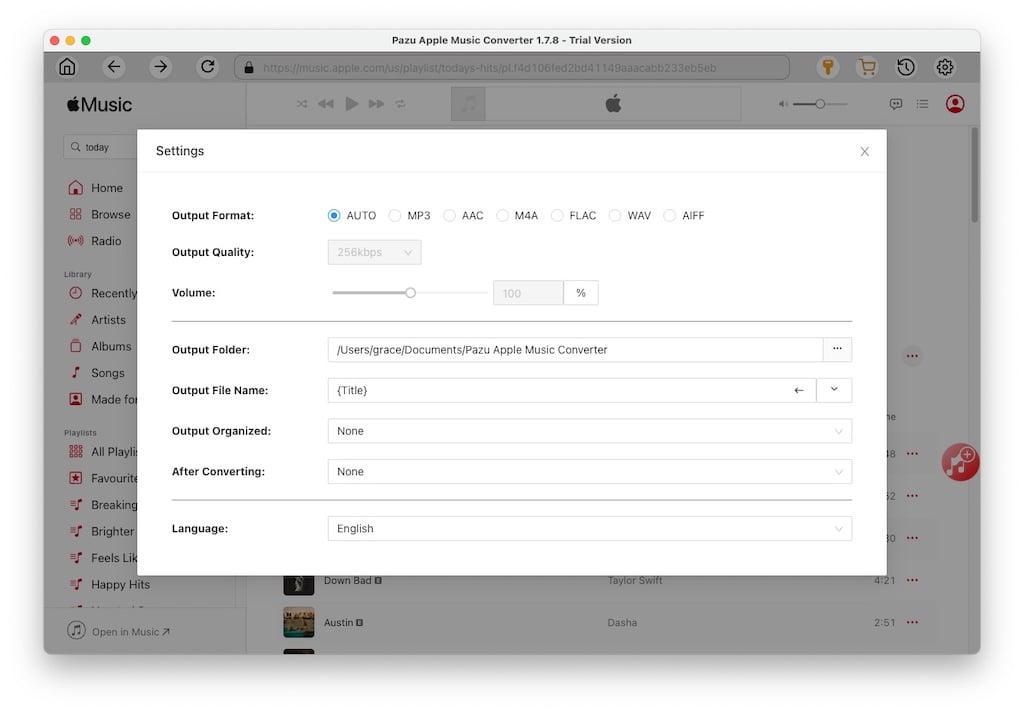
Click the gear icon to customize settings such as the output format and output folder. The default format is M4A in 256kbps. Apple Music Converter also supports MP3, AAC, FLAC, WAV, and AIFF.
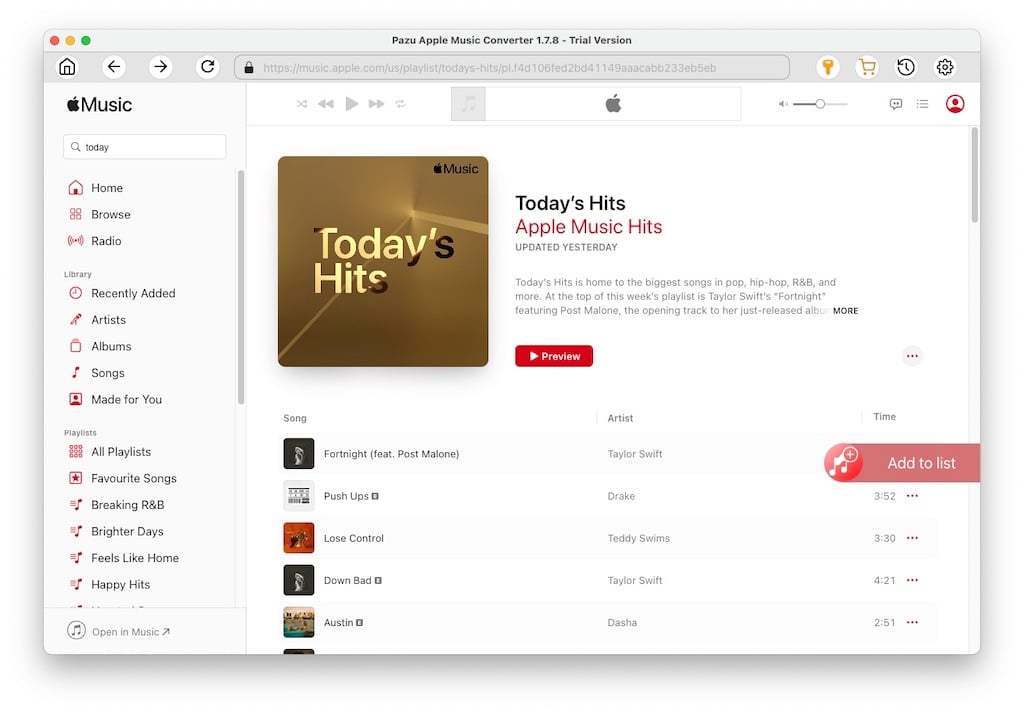
Search for a playlist, artist, or album you want to download. Click the “Add to List” button to load all songs in the album or playlist.
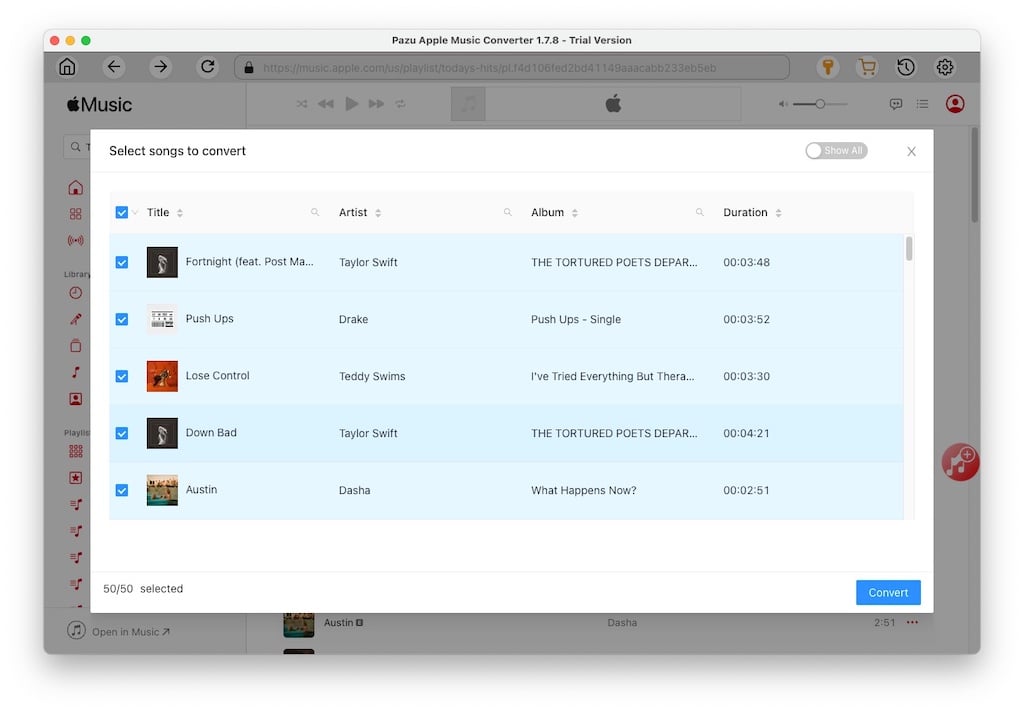
Uncheck the songs you don’t want. Click the “Convert” button to start downloading.
Once downloaded, click the clock icon in the upper right to view the converted Apple Music songs. Click the Folder button to locate them in the output folder. You can play them on any supported device, even after your subscription ends.

Download Apple Music to MP3, M4A, etc.