“I really enjoy some of the suggestions after finishing an album, but sometimes I can’t find those songs later on. Is there a way to see my Spotify listening history so I can find those tracks?”
Absolutely. Spotify provides a feature known as “Recently Played” or listening history for this purpose. In this article, we’ll guide you on how to find your Spotify listening history on both mobile devices and desktops. While Spotify currently doesn’t provide an option to delete songs or clear the listening history, we’ll also introduce alternative methods to manage it and avoid misleading recommendations in your recently played.
The listening history on music streaming platforms like Spotify is a convenient feature with several benefits. One is to rediscover your favorite songs by reviewing what you’ve recently listened to. This can be particularly helpful for finding tracks you might have forgotten but want to hear again. It also makes playlist creation easier, as you can build playlists based on your recent preferences without searching for each song individually.
Moreover, Spotify uses your listening history to offer personalized recommendations. By analyzing your preferences and habits, the platform suggests new songs and artists that align with your taste.
Spotify makes it straightforward to find your listening history. There is a “Recently played” section right on the Home page to show albums, artists, and playlists you recently listened to. If you want to see the specific tracks in your listening history, use the following steps on your mobile and desktop devices.
To access your Spotify listening history on your iOS or Android device, you can open the Spotify app and scroll down to “Recents.” Or you can find your listening history with these steps:
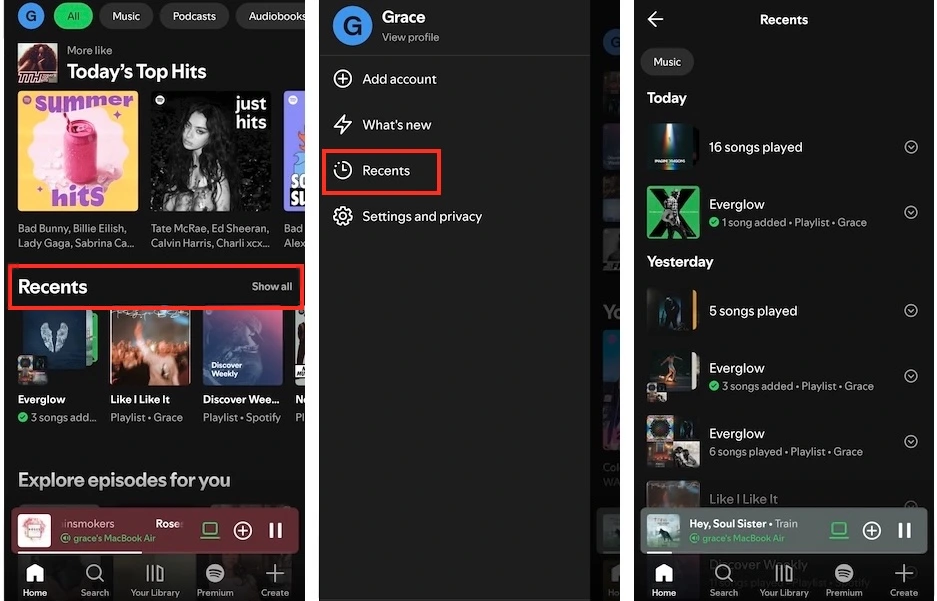
You can also see your listening history of specific tracks on your Spotify desktop app. However, the web player only shows the recently played playlists and albums.


With Spotify’s listening history, you can view past activities going back about two months. However, Spotify offers a “Download your data” feature that allows you to request a copy of your personal data. This includes your “Streaming history for the past year” and “Extended streaming history for the lifetime of your account“, covering track information and details about when and how you streamed content. Follow the steps below to request your entire listening history from Spotify.
1. Log into https://accounts.spotify.com/. Scroll down to the “Security and privacy” section and select “Account Privacy.
2. Check the boxes below “Account data” and “Extended streaming history“, and click the “Request data” button.

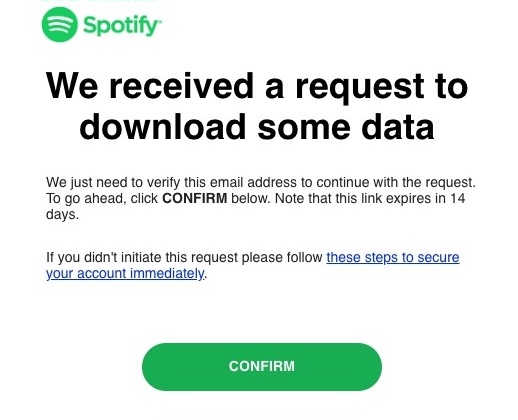
3. Go to your email inbox, find the “Confirm your Spotify data request” email from Spotify, and click the “CONFIRM” button. Then, wait for your data to be prepared for downloading.
Unfortunately, You cannot clear your Spotify listening history or recently played unless you delete your account. You cannot remove songs from the Recently Played either. While Spotify once allowed users to delete songs from this section, that feature was removed and hasn’t been brought back.
However, if you want to manage your listening history, perhaps removing songs played during sharing your phone on a road trip or those you dislike from autoplay so they don’t influence your recommendations, here are some alternative methods to consider.
While Spotify currently doesn’t allow removing songs from your Recently Played or listening history, you can still take steps to prevent specific songs from playing in the future or to minimize their impact on your music recommendations.
If you want to prevent certain songs from appearing in your Recently Played, turn on Private Session before you listen to them on Spotify. Private Session is off by default. Once it’s on, any music you listen to won’t show up in your “Recently Played,” won’t be visible in Friend Activity, and won’t update your Top Artists. Please note that Private Session will end when you restart Spotify or after a long period of inactivity.
1. Go to the Spotify app on your Mac or Windows computer. Click your Profile icon at the top right and select Private session.

2. The Private Session is enabled with a padlock on the top of the screen.


The Taste Profile on Spotify is how the platform understands your musical preferences, all based on your listening habits. It plays a crucial role in personalizing your music recommendations, powering features like Discover Weekly and your Home page, and even contributing to personalized experiences like Spotify Wrapped.
If you exclude a playlist from your Taste Profile, both past and future listens from that playlist will have less impact on your taste summaries and recommendations. Streams from excluded playlists will not be included in the top artist or track counts for Spotify Wrapped, but still contribute to your total listening time.
Excluding a playlist from your Taste Profile usually takes effect within 48 hours. However, some recommended content, like Discover Weekly, might not reflect these changes immediately and may take until the following week to update.
Here’s how to exclude a playlist from your Taste Profile on Spotify. You can do this on your mobile and desktop Spotify app, as well as the web player.

If you want to prevent certain songs in your Recently Played list from being played in the future, you can use hide the song feature within a Spotify playlist. For individual songs displayed in “Recently Played” that aren’t part of a playlist, use the “Don’t play this” feature instead.
However, please note:
To hide a song in a playlist from your Recently Played, follow these steps:


To stop a song in your listening history from being played in the future:

Another effective way to prevent certain songs from appearing in your Recently Played list is to download them as MP3 files for offline listening. This approach also ensures you’re prepared for situations where an internet connection may not be available.
To download Spotify songs and playlists with or without a Premium subscription, you can use a smart Spotify music downloader — Pazu Spotify Converter. This tool is designed for both Spotify Free and Premium users to download Spotify songs, playlists, albums, and podcasts for offline listening. It can extract Spotify music and convert it to various high-quality formats, including MP3, M4A, AIFF, WAV, FLAC, and AAC. This allows you to enjoy Spotify Premium features within a free account and you can transfer the downloaded tracks to any compatible devices. An additional benefit of using Pazu Spotify Converter is that the downloaded songs won’t be shown in your listening history.
Now, let’s learn how to use Pazu Spotify Music Converter to download and convert Spotify songs with a free subscription from the following tutorial.
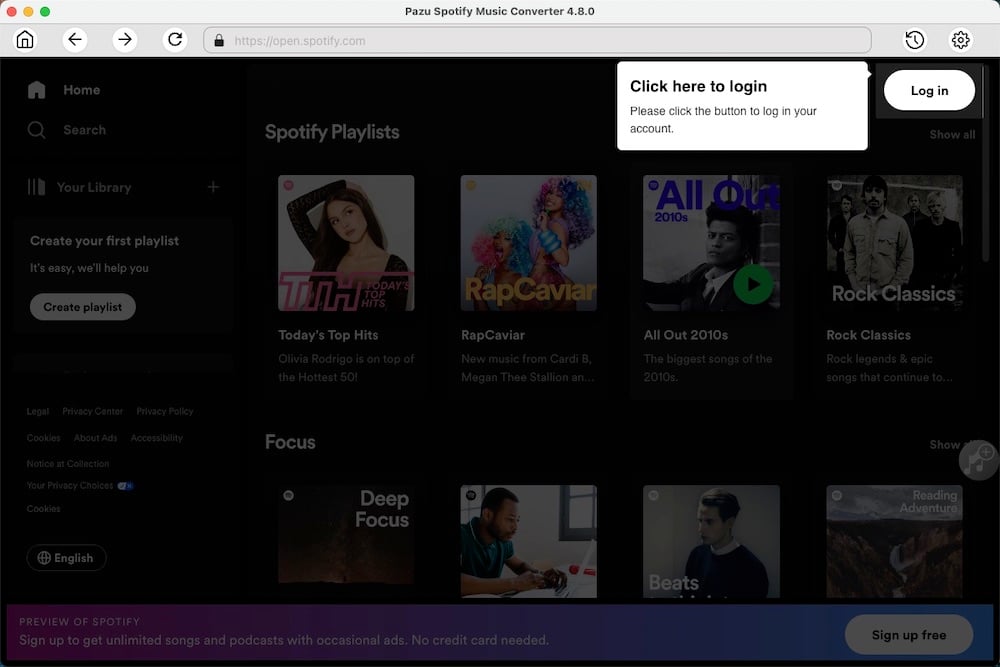
Download, install, and run Pazu Spotify Converter on your Mac or Windows. Log in to your Spotify account with the built-in web player.
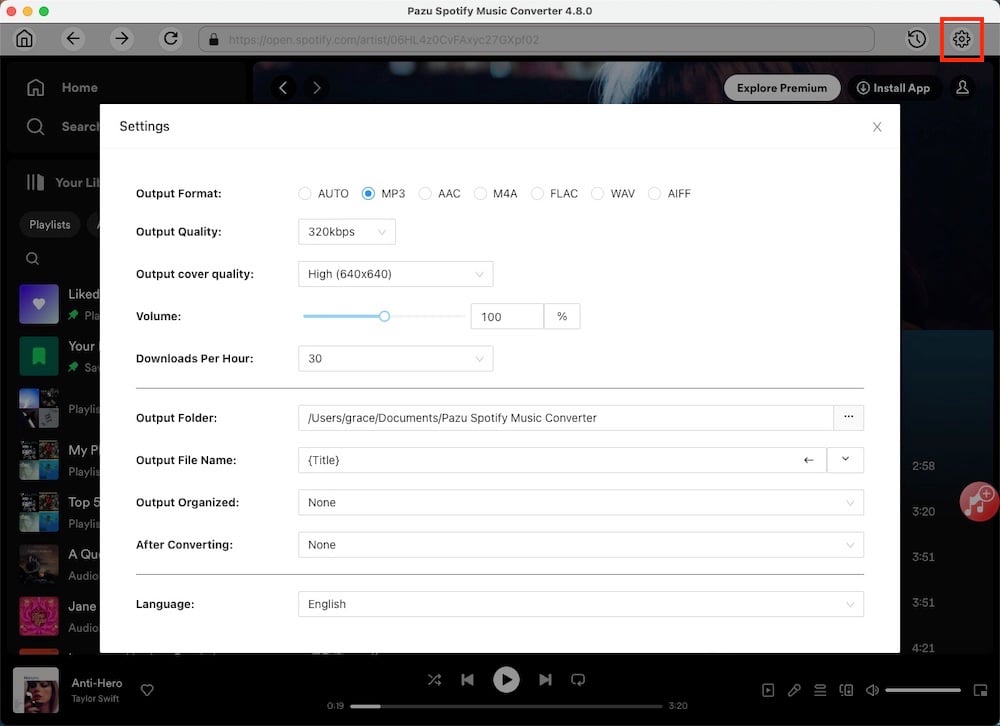
Click the gear icon on the top right corner. Here you can select the output format (AUTO[M4A], MP3, AAC, FLAC, WAV, or AIFF), choose output audio quality, customize the output path, organize the output files in various ways, rename output files, and more.
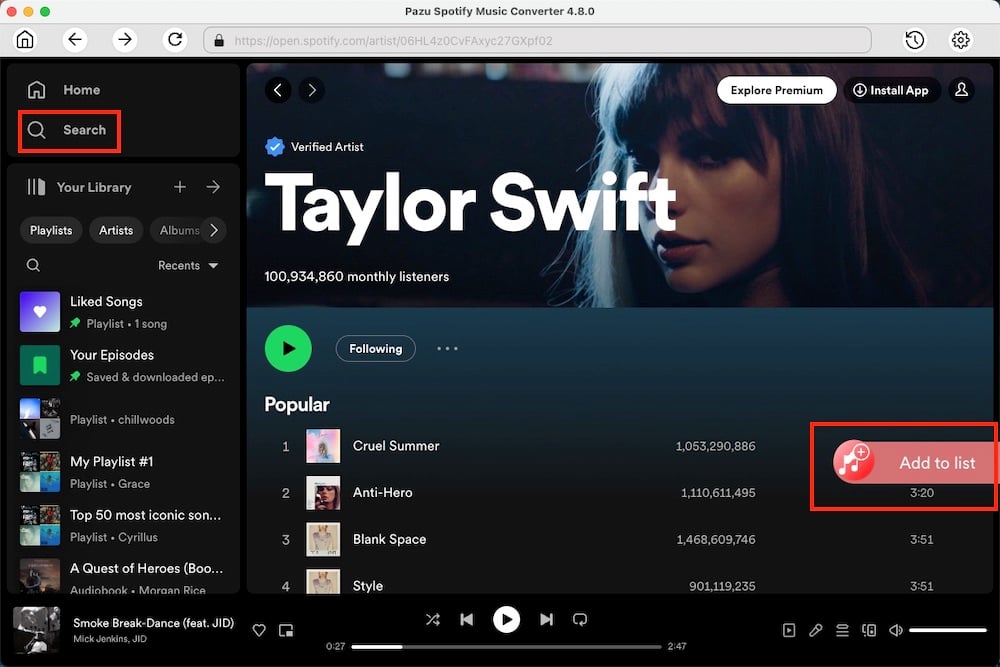
Use the integrated Spotify web player to search the songs, albums, or playlists, you want to download. Click the Add to List button to load all songs in the album or playlist.
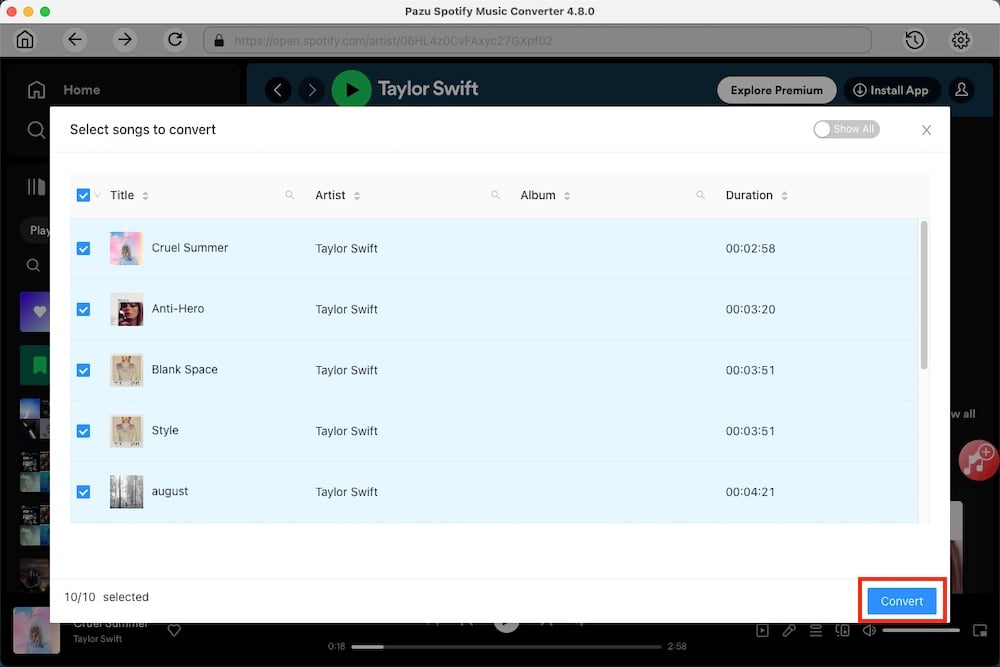
You can download individual songs or batch-convert the entire playlist. To download individual songs or specific songs of your choice, simply uncheck the ones you don’t want to download.
Click the Convert button to start downloading the Spotify songs to your local computer.
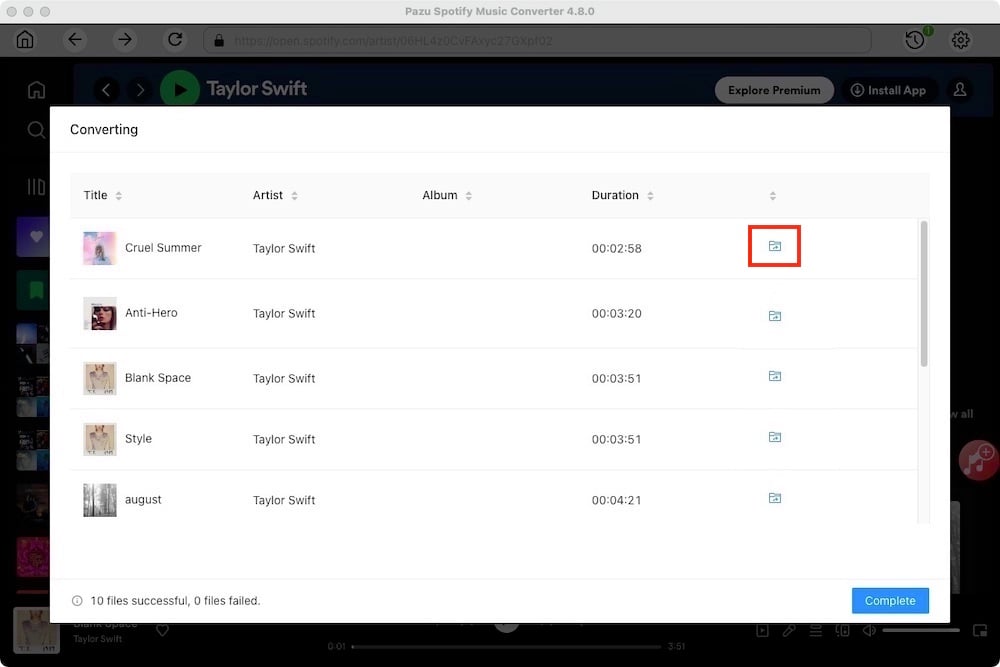
Once the conversion is done, you can find your Spotify songs downloaded as local files by clicking the folder button or directly going to the output folder you customized in the previous step.
Note: The free trial version of Pazu Spotify Converter enables you to convert the first three minutes of each song. You can remove the trial limitation by purchasing the full version.

Download and convert any Spotify songs, albums, playlists to MP3/M4A etc.