How to upload music to Spotify? It depends on whether you are an artist and want to sell your music on Spotify or just want to upload your local music to Spotify and use Spotify app to play any audio file on your device.
In 2018, Spotify announced a new beta feature that allowed independent artists to upload their music directly to the platform instead of through a label or digital aggregator. However, one year later, Spotify ended its direct-upload program. In its announcement, Spotify said, “We’re working with our distribution partners to help make this transition as simple as possible for the artists who uploaded music through the beta. At the end of this month, we’ll stop accepting any new uploads through Spotify for Artists, and artists will need to move their already released content to another provider.” Once again, independent artists will have to upload their music to the streaming service through third-party distributors(e.g., Tunecore, Distrokid, and Stem).
Whether you’re an established artist or just getting started, if you want to upload your songs to Spotify and get paid, you may use Tunecore. Tunecore offers 3 plans for you to upload music to Spotify: RISING ARTIST($24.99/year), BREAK ARTIST($44.99/year), and Professional($54.99/year). Submit your music on Spotify and other Digital Stores with TuneCore starting at $24.99 to publish a single and $44.99 to upload an album or an EP.
HOW TO GET YOUR MUSIC ON SPOTIFY
Besides Spotify, TuneCore also allows independent artists to add music to more than 150 online music stores and streaming services across the world, including iTunes, Apple Music, Amazon Music, etc.
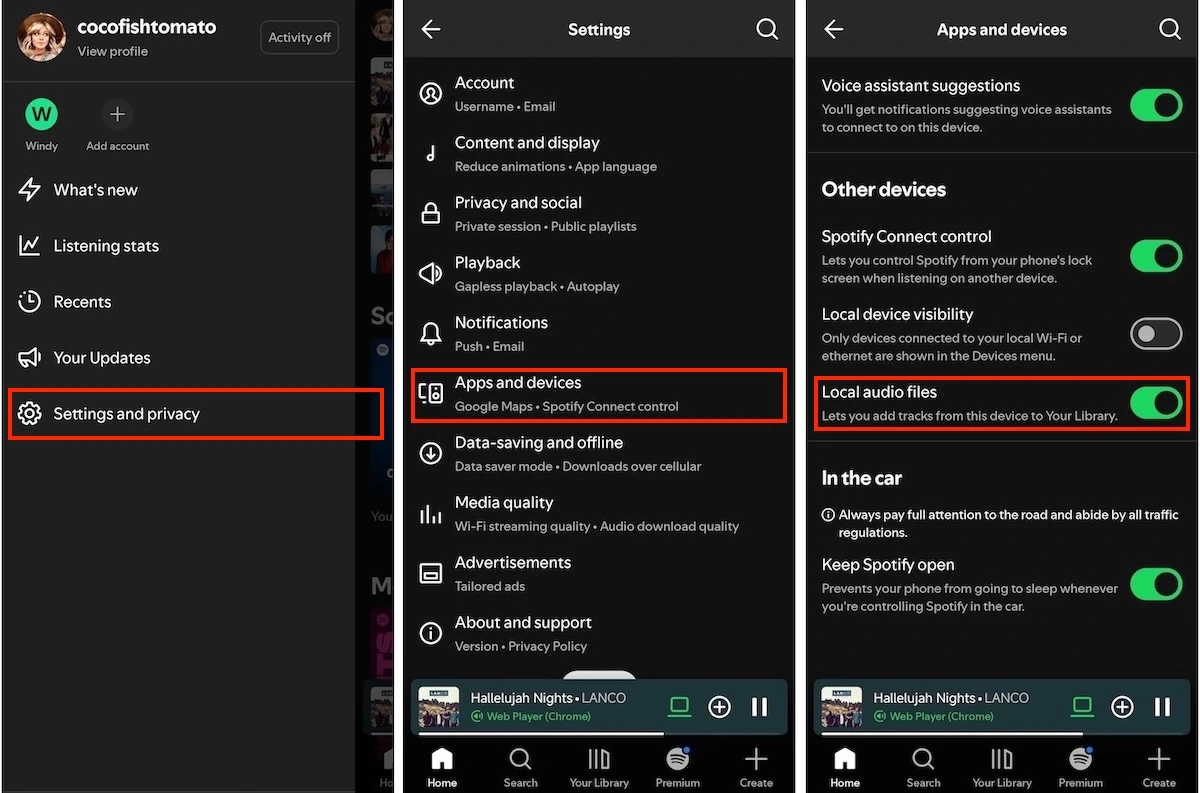
Besides the millions of tracks Spotify offers, you can also use the app to play any audio file on your device. To enable that feature, make sure the songs are stored on your device and turn on “Local Files”. Spotify supported audio formats including MP3, M4A, AIFF, WAV, etc.
On iOS/Android:
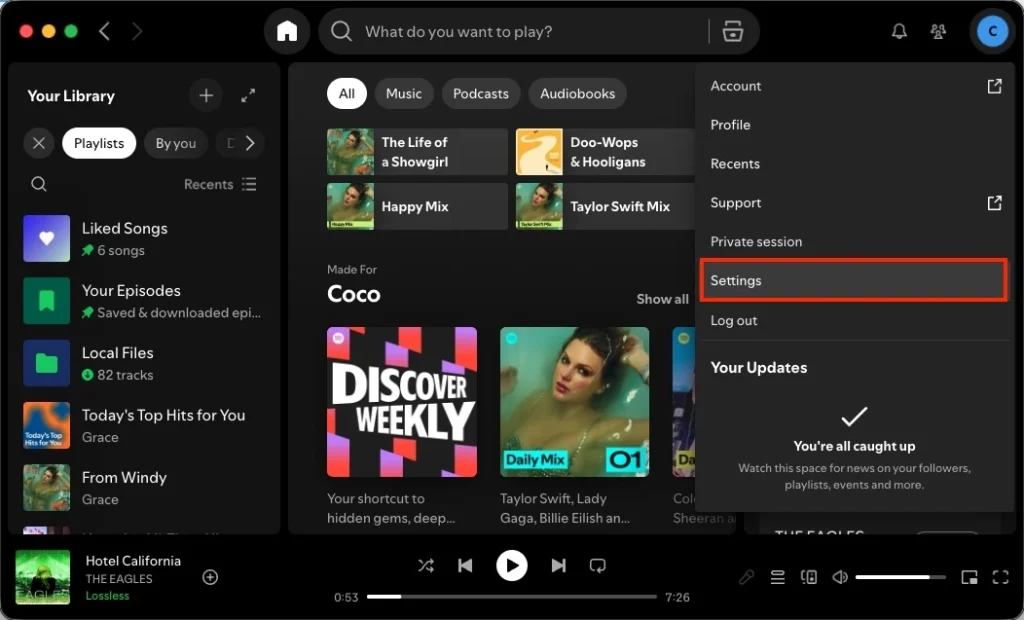
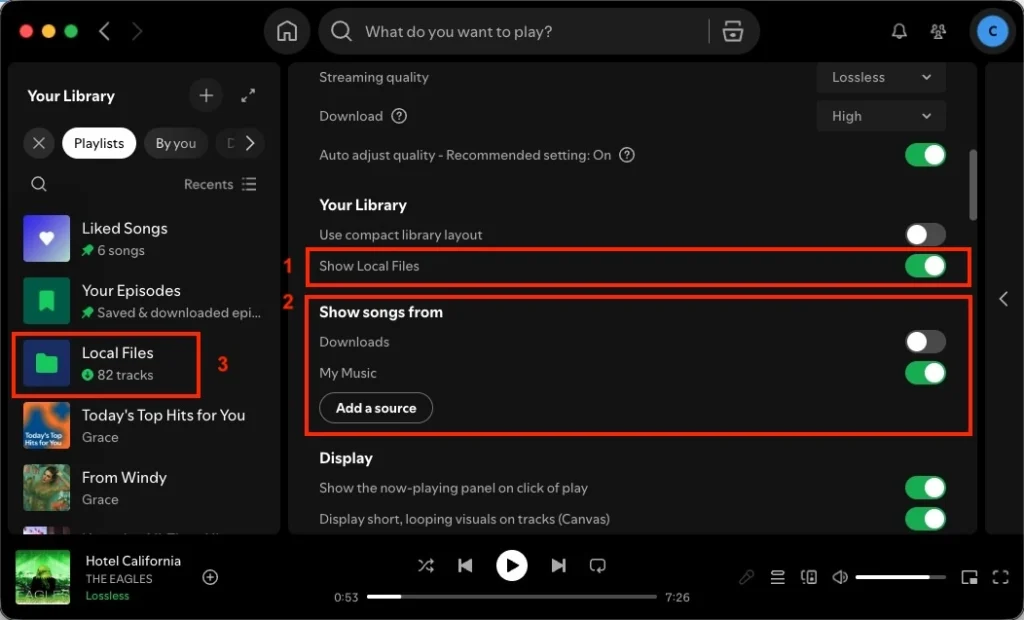
On desktop:
One of the best benefits of Spotify Premium is to download Spotify songs, albums, and playlists for offline playback. However, once you cancel Spotify Premium, your downloaded songs, albums, and playlists are no longer available offline. You can only stream them online with ads and limited skips. If you want to listen to Spotify offline after cancelling Spotify premium, the best way is to download your favorite songs, albums and playlists to MP3 with Pazu Spotify Converter.
Pazu Spotify Converter is specially designed for you to download Spotify music to common formats with either a free or premium account on Mac/Windows. Pazu Spotify Music Converter allows you to convert Spotify songs to the most popular audio formats, such as MP3, M4A, WAV, FLAC, AAC, and AIFF. With the adoption of advanced encryption technology, it’s able to keep all the converted audio files with 100% lossless audio quality and the original ID3 tags and metadata information. For more details, you can check them below.
Key features of Pazu Spotify Converter:
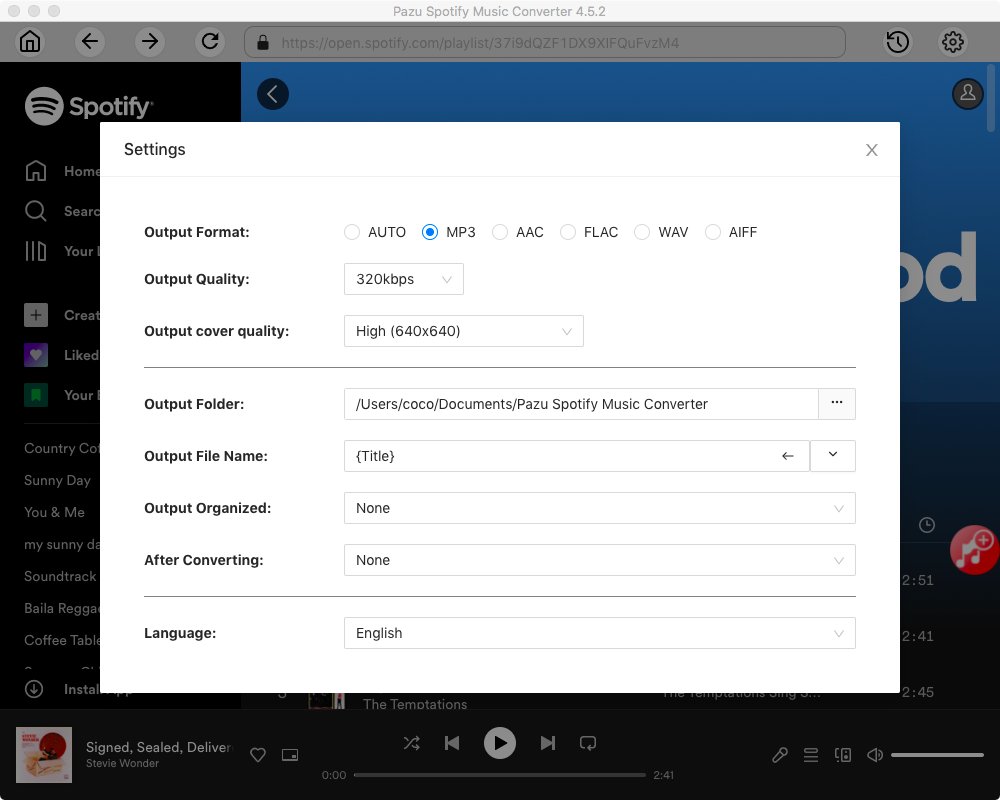
Download, install and run Pazu Spotify Converter on your Mac or Windows. Log in your Spotify account with the built-in web player.

Click the gear icon in the top right corner to open Settings window. Here you can choose:
Select the songs, album or playlist you want to convert to MP3. Spotify Converter will detect and select all songs in the playlist or album by default. Uncheck the songs you don’t want to download if there are any. Click “Show All” icon to toggle “Hide Converted” on in case some songs have been downloaded before.
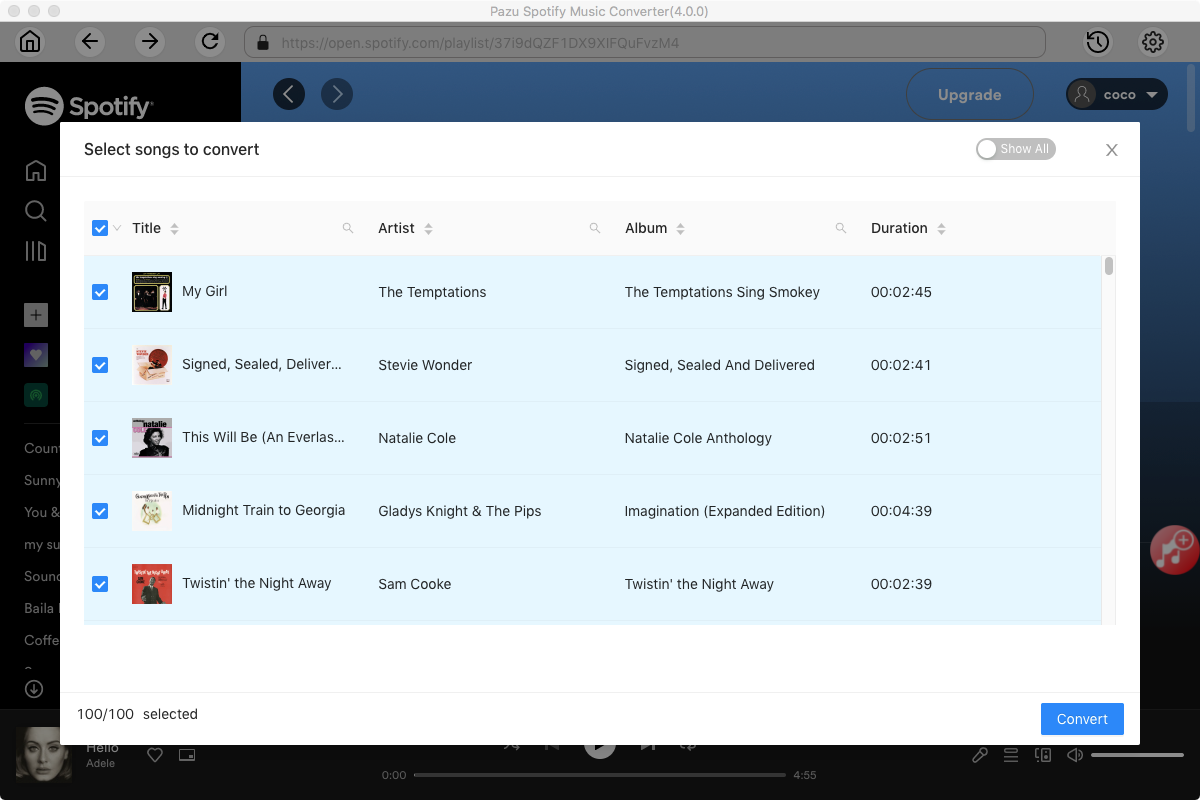
Click the Convert button to download Spotify songs to MP3.

Once the conversion is done, click the folder icon to find the downloaded mp3 songs. You can then transfer the Spotify music to Apple Music or Amazon Music, or play them with your favorite music player for iOS/Android.
Note: The free trial version of Pazu Spotify Converter enables you to convert the first three minutes of each song. You can remove the trial limitation by purchasing the full version.

Download and convert any Spotify songs, albums, playlists to MP3/M4A etc.