

Music lovers may transfer between music streaming services for various reasons, as each platform offers distinctive features and caters to specific preferences. If you’re considering switching from Spotify to Tidal, a primary motivation could be Tidal’s superior audio quality.
Spotify provides a maximum audio quality of 160 kbps for free users and 320 kbps for Premium members in most markets. While Spotify now offers Lossless audio up to 24-bit/44.1 kHz FLAC, it’s limited to certain countries and regions. For Premium users, Tidal’s audio quality “Low” can reach up to 320 kbps, “High” for 16-bit/44.1 kHz, and “Max” up to 24-bit/192 kHz FLAC.
The difference in audio quality may be a compelling reason for users who prioritize a higher-fidelity listening experience to choose Tidal over Spotify. However, copying your long-time curated playlists from one platform to another can be a headache. Not to worry, there are third-party playlist transfer tools available to make the process easier. Tidal even recommends such a service on its website. Furthermore, you can also convert CSV/TXT files to Tidal playlists.
Related: Tidal vs. Spotify, Which Is Better
A playlist transfer tool is software or an online service that facilitates migrating playlists or music libraries from one music streaming platform to another. Popular tools including TuneMyMusic, Soundiiz, FreeYourMusic, and SongShift.
TuneMyMusic is an online playlist transfer tool, meaning you don’t need to install any app to use. It offers both Free and Premium plans. With the free plan, you can convert up to 500 tracks, but it doesn’t include automatic playlist syncs. Premium users, priced at $5.5 per month or $2 per month with annual billing ($24.00/year), enjoy unlimited playlist conversions and up to 20 Automatic Syncs. The online tool also supports exporting playlists to TXT and CSV files. Additionally, you can copy your favorite artists from your Spotify library to Tidal, as well as your Liked Songs. However, TuneMyMusic cannot transfer playlists curated by Spotify, such as RapCaviar.
Similar to TuneMyMusic, there are also some limitations with the free versions of other playlist transfer tools. Soundiiz is an online tool but also provides apps for Android and iOS. With a free account, you can only transfer playlists one by one, and each playlist can contain up to 200 songs. The FreeYourMusic free trial allows you to transfer up to 300 tracks, and you need to install the app first. SongShift is free with premium features for a fee, but it is exclusively available on iOS devices.
Related: Review of Playlist Transfer Tools
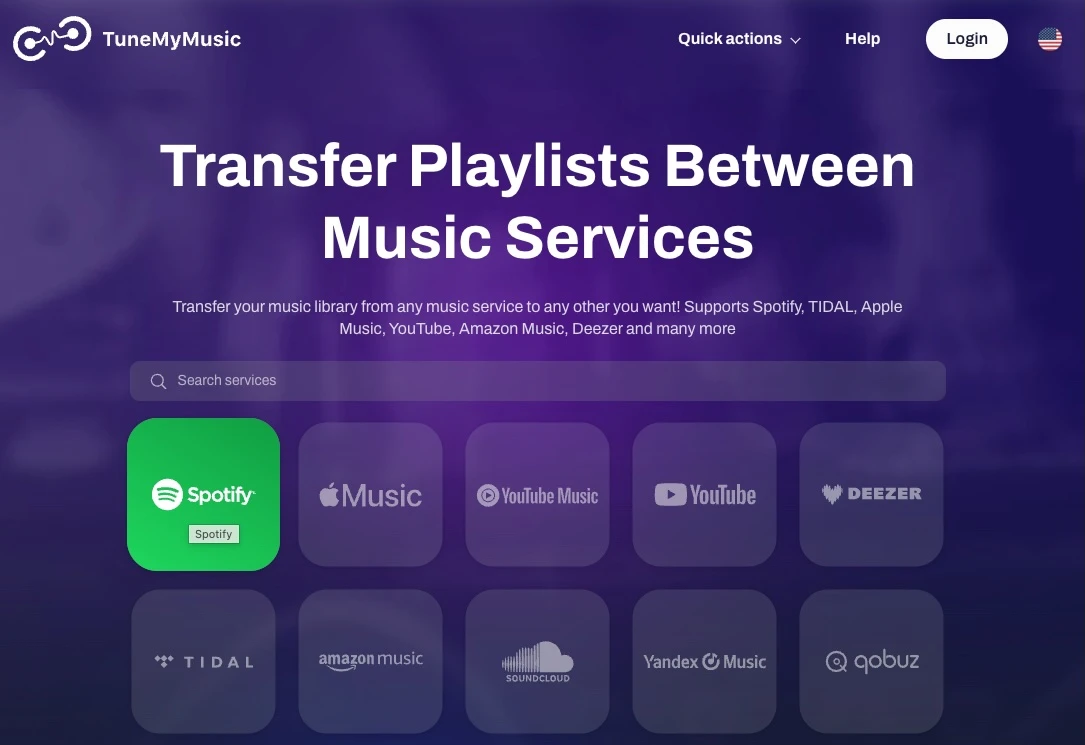
Taking TuneMyMusic as an example, here’s how to transfer your Spotify playlists to Tidal:
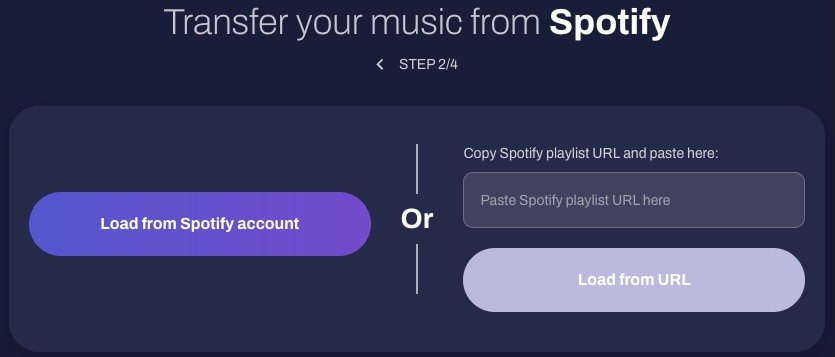
3. Select “Load from Spotify account” to access your playlists.
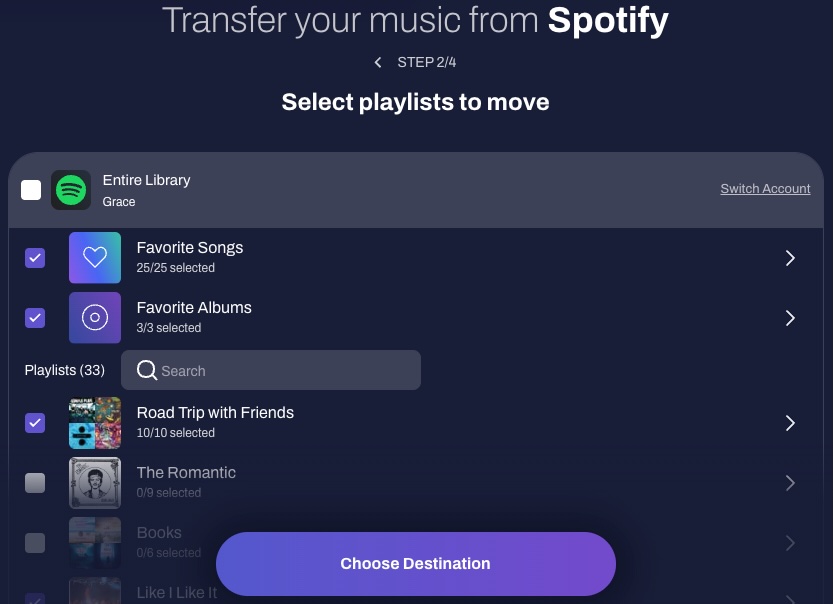
4. Select the playlists you want to transfer to Tidal. Then click “Choose Destination.”
You can see playlists made by you and other users in your Spotify Library, together with your favorite songs and artists. Algorithmic playlists curated by Spotify will not be shown here.
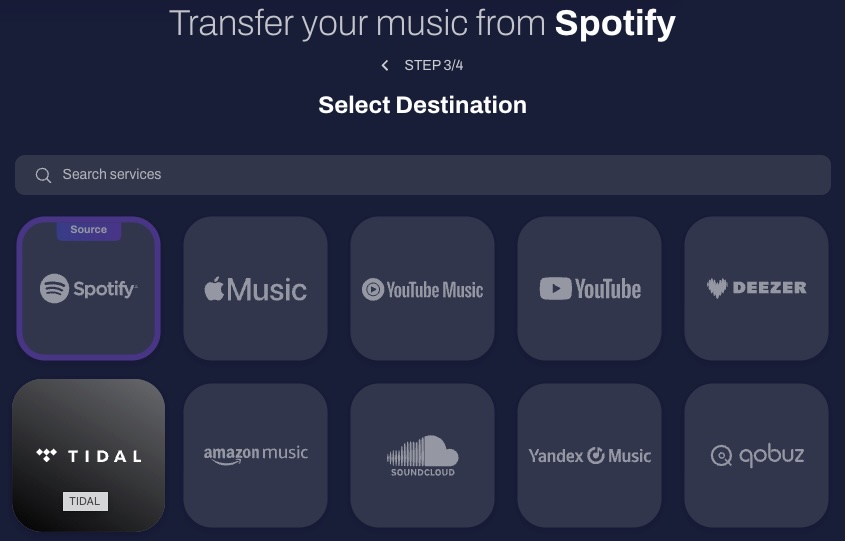
5. Choose Tidal, log into your account, and connect the app to your Tidal.
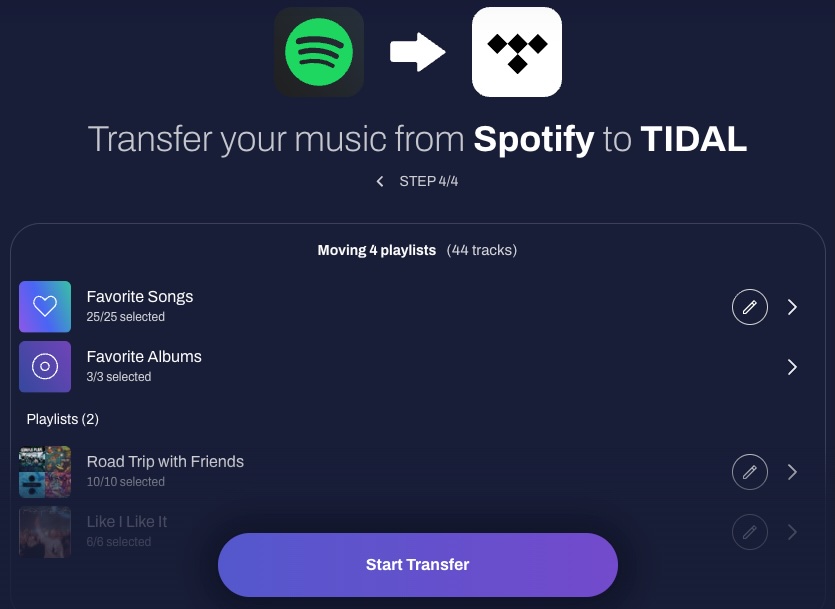
6. Click “Start transfer.”
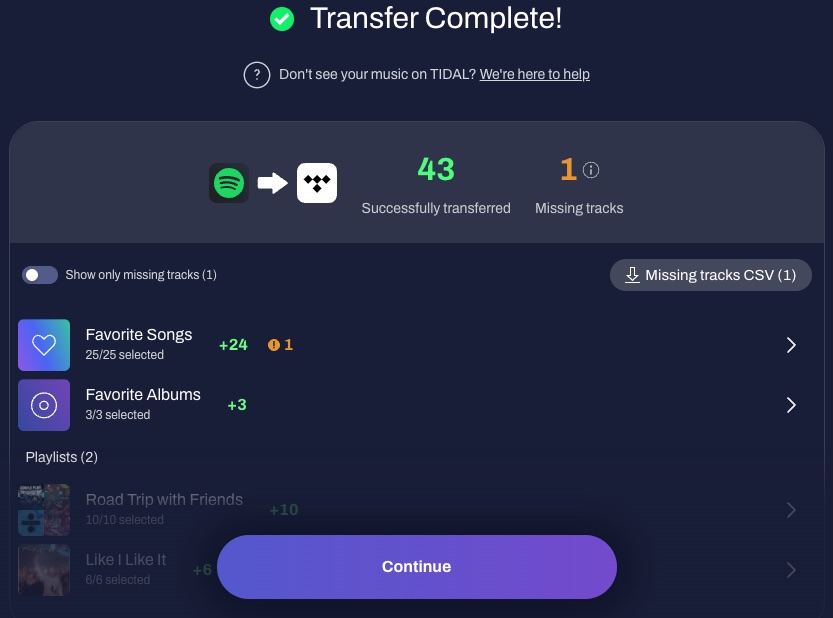
7. Once completed, TuneMyMusic will give you a report on which playlists have been transferred. You can check songs that failed to transfer or download the cvs file of the missing tracks.
TuneMyMusic also allows you to transfer CSV/TXT files as Tidal Playlists. You can use a tool like Exportify to export Spotify playlists to Excel. Then, you can edit the CSV file or save it as a .txt file for easier import into Tidal playlists.
Your CSV files need to contain the following information for each track: track name, artist name, and playlist name. TuneMyMusic can transfer it into playlists in your Tidal collection.
| Track name | Artist name | Playlist name |
| I Ain’t Worried | OneRepublic | Best Day of My Life |
| American Authors | Best Day Of My Life | Best Day of My Life |
| The Scientist | Coldplay | Counting Stars |
| Counting Stars | OneRepublic | Counting Stars |
For TXT files, you can include only the artist and track names. This format is simpler to work with, but TuneMyMusic will transfer all songs from the TXT file into a single playlist on Tidal.

Follow the guide below to convert a CSV file into Tidal playlists with TuneMyMusic:
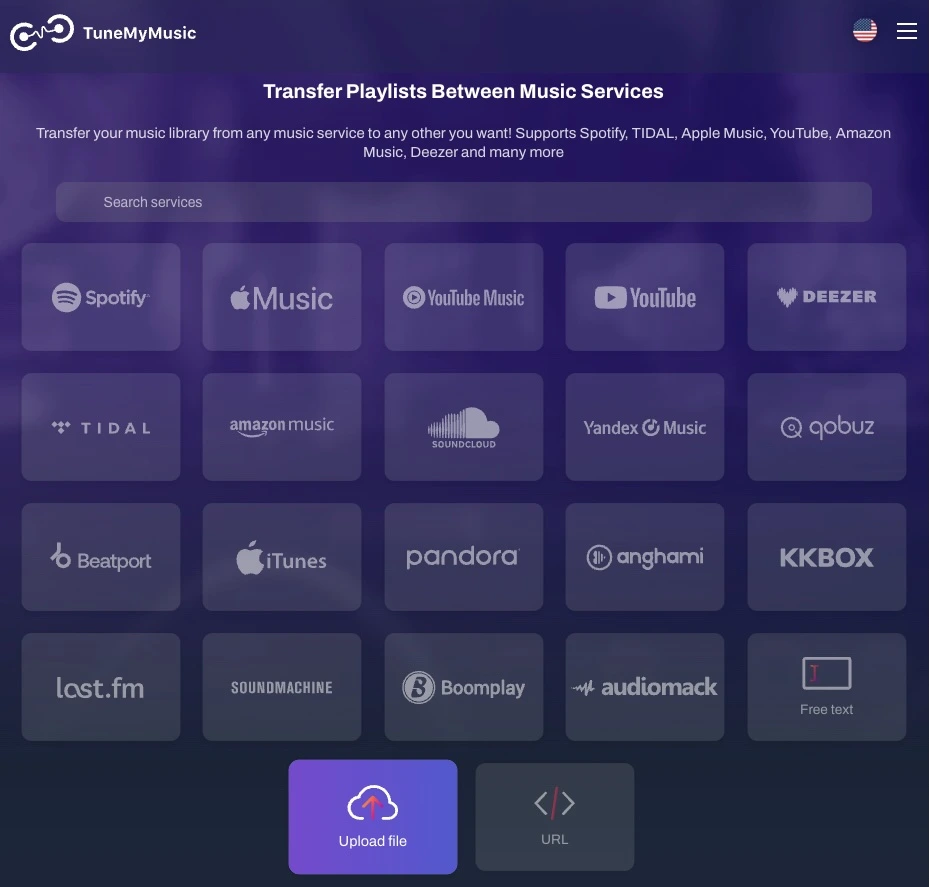
1. Visit https://www.tunemymusic.com/ and select “Upload file.”
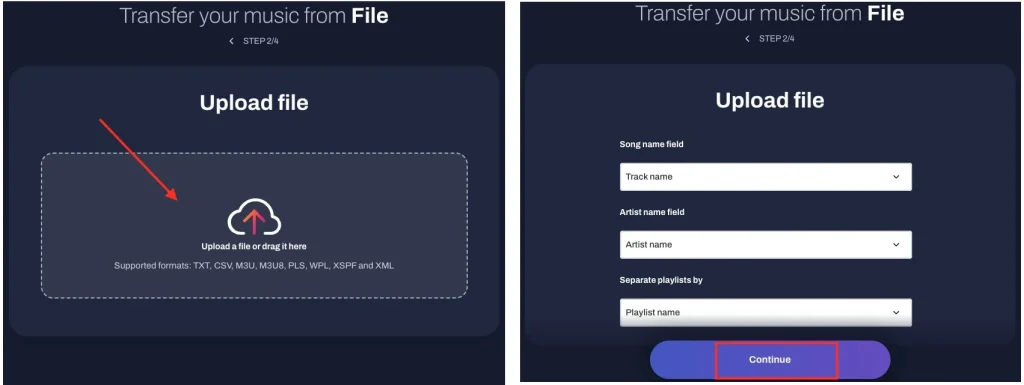
2. Drag the CSV file to the upload field. Set the song name, artist name, and playlist name as the corresponding column titles in the file. Then click Continue.
3. Select the playlists you want to transfer. Click Choose Destination and select Tidal as your destination.
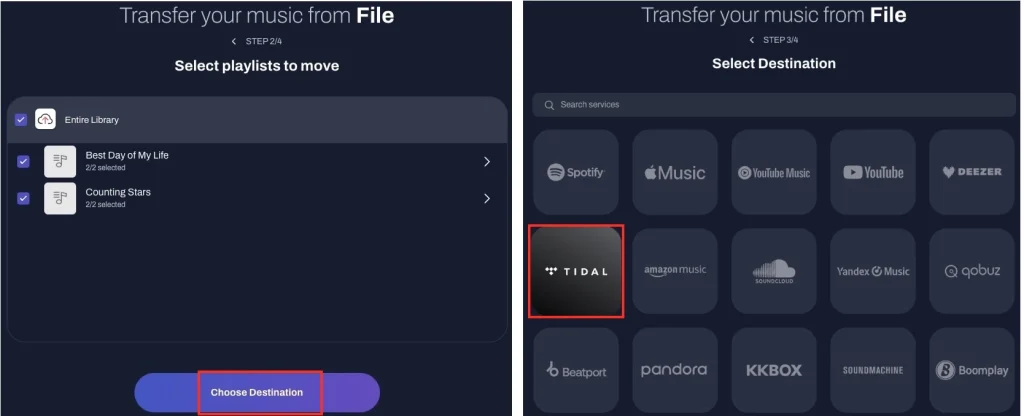
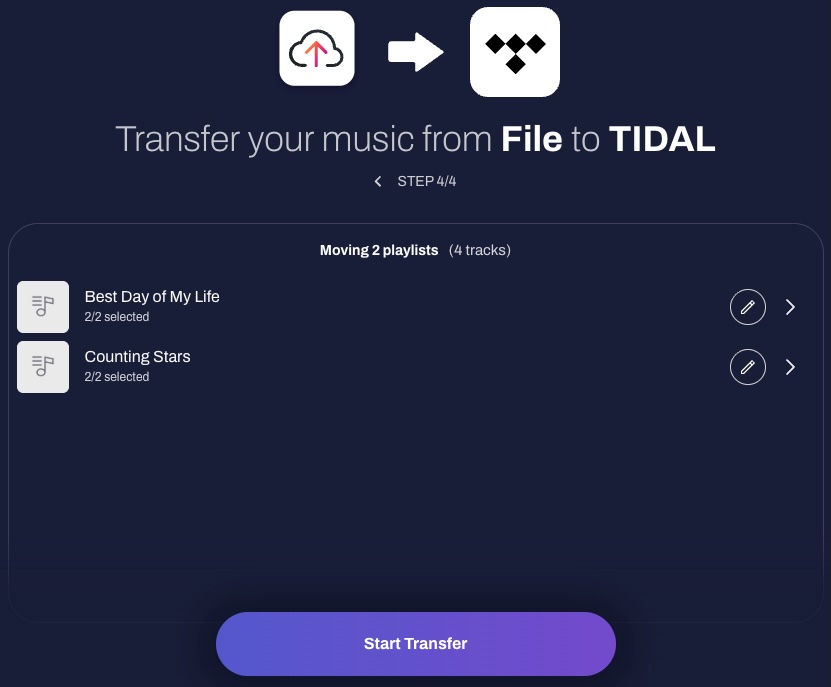
4. Click Start Transfer, then wait for TuneMyMusic to transfer the songs to Tidal playlists.
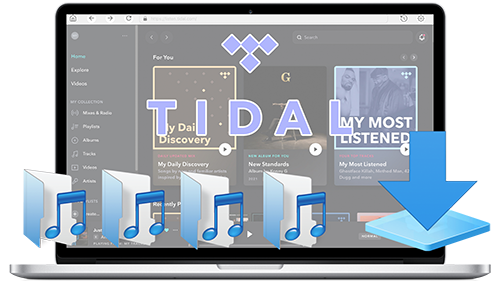
If you’re looking for a method to download your favorite Tidal tracks to MP3 or FLAC, Pazu Tidal Converter is the best choice. This powerful tool enables you to convert any Tidal songs, albums, or playlists to a range of popular audio formats, including M4A, MP3, AAC, FLAC, WAV, and AIFF, on your Mac or Windows device. By following the simple steps outlined below, you can quickly and easily download Tidal music to MP3 or FLAC and enjoy your favorite tunes offline, anytime and anywhere.
Download, install, and run Pazu Tidal Converter on your Windows, which features a built-in Tidal web player.

If you have purchased a license, click the key icon to register the converter. If not, continue using the trial version.
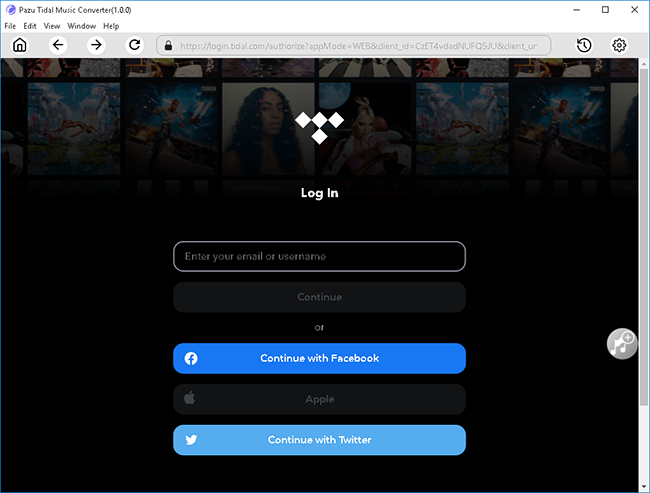
Follow the onscreen instructions to log in to your Tidal account. Enter the credentials and hit Log In to proceed.
In addition to MP3, the Pazu Tidal Converter lets you download Tidal songs to M4A, AAC, FLAC, WAV, and AIFF. Click the Settings option (the cog icon) located at the top right corner to change the output format or output folder if you need.
You can also customize the output song name with any combination of Title, Artist, Album, Track Number, and Playlist Index.

Click any playlist you want to download.

Then click the red icon to load songs. All songs in the playlist will be added by default. You can uncheck the songs you don’t want to get.

Click the Convert button to start downloading Tidal music to MP3.

After conversion, click the folder icon to quickly locate the downloaded Tidal songs in the format you choose.


Download Tidal songs/albums/playlists to M4A etc